Drum sander - finishing touches.
- rocket
- Blackwood
- Posts: 1210
- Joined: Thu Apr 30, 2009 8:43 pm
- Location: melbourne,, outer east
- Contact:
Re: Drum sander - finishing touches.
Kim, that's a very clever idea, soaking the used sanding belts to clean them. i'll be giving that a go myself !!!
Cheers,,,
Rod.
Cheers,,,
Rod.
Like I said before the crash, " Hit the bloody thing, it won't hit ya back
www.octiganguitars.com
Re: Drum sander - finishing touches.
It's the same process Kim uses to get more mileage out of his toilet paperrocket wrote:Kim, that's a very clever idea, soaking the used sanding belts to clean them. i'll be giving that a go myself !!!
Cheers,,,
Rod.
Martin
Re: Drum sander - finishing touches.
And the tyres on the wife's car too.kiwigeo wrote:It's the same process Kim uses to get more mileage out of his toilet paperrocket wrote:Kim, that's a very clever idea, soaking the used sanding belts to clean them. i'll be giving that a go myself !!!
Cheers,,,
Rod.
Re: Drum sander - finishing touches.
I'd want to try it on my $10 notes to see if I can get more mileage out of them, but it's illegal.......money laundering
Craig
I'm not the sharpest tool in my shed
Re: Drum sander - finishing touches.
Oh dear.... ..........................Clancy wrote:I'd want to try it on my $10 notes to see if I can get more mileage out of them, but it's illegal.......money laundering
- Rod True
- Siberian Tiger
- Posts: 234
- Joined: Thu Sep 27, 2007 10:18 am
- Location: Abbotsford, BC Canada
Re: Drum sander - finishing touches.
Kim, have you tried oven cleaner to help get the burn on stuff loose?
"I wish one of the voices in your head would tell you to shut the hell up." - Warren De Montegue
-
- Sassafras
- Posts: 47
- Joined: Tue Sep 20, 2011 4:24 am
Re: Drum sander - finishing touches.
Just did this with the oven cleaner/nail brush/clean water rinse for the first time recently and 5 from 6 strips turned up virtually like new.
Re: Drum sander - finishing touches.
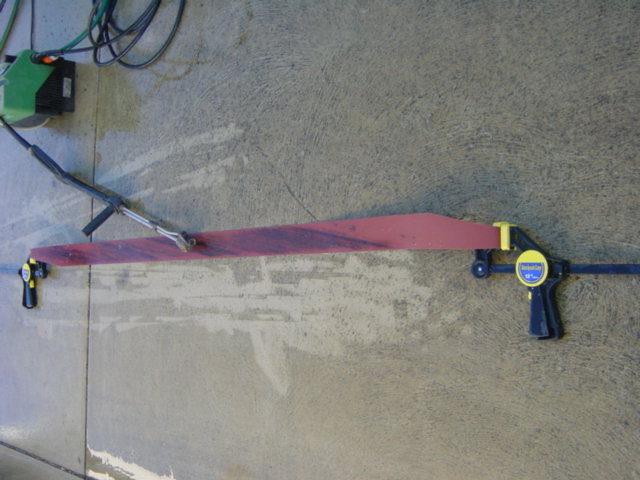
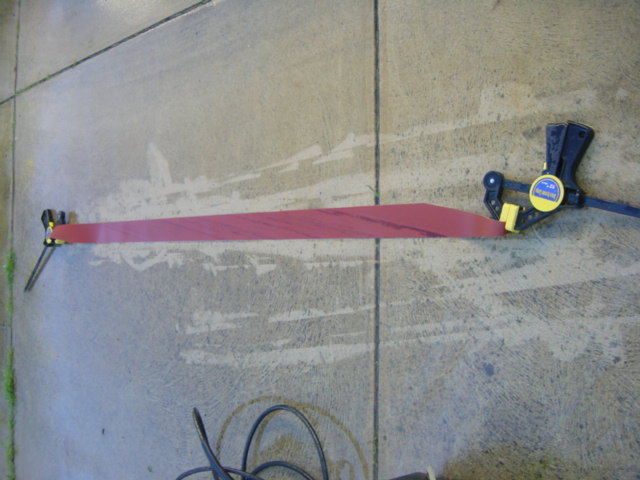
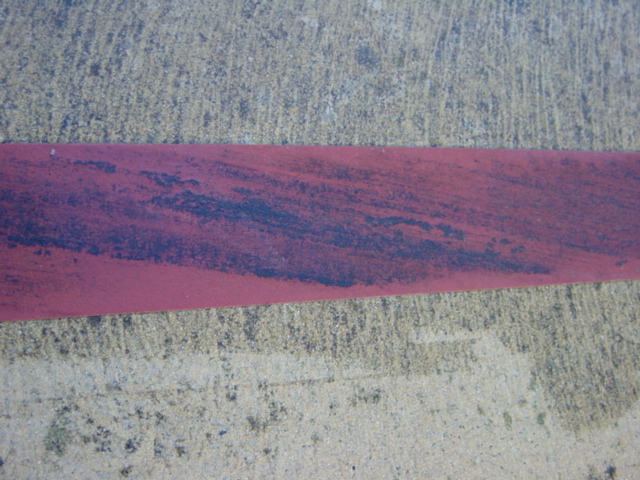
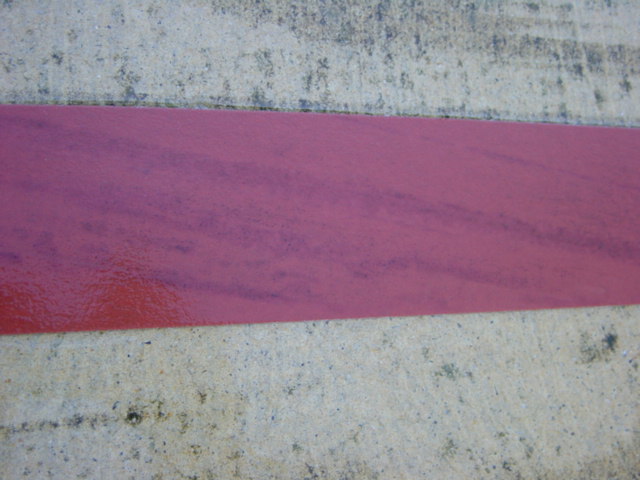
To be honest I have not found the need for oven cleaner Rod. Just soaking in water is enough for most of the crud to just fall off by itself. If there is anything 'badly' burnt on like you will get when sanding bocote and the likes, just leave the belt in the bucket a day or so longer and the most you will need to do is a very quick pass with a stiff nylon brush to dislodge the black from between the grit. I don't even do that anymore because I just line the soaked belts up and hit them with a pressure washer and they blast clean instantly. Yes it is true that a dark stain can remain where the hard burnt on crud use to be, but I don't see the point of trying to remove that because it does not effect how the belt functions at all, its just a stain and no more than that.Rod True wrote:Kim, have you tried oven cleaner to help get the burn on stuff loose?
I did post some photos on here once, I will see if I can dig them up..
Here ya go..
viewtopic.php?f=5&t=831
Cheers
Kim
Re: Drum sander - finishing touches.
Should be just the ticket for removing "stains" from toilet paper....
Martin
- charangohabsburg
- Blackwood
- Posts: 1818
- Joined: Sat Oct 16, 2010 1:25 am
- Location: Switzerland
Re: Drum sander - finishing touches.
Martin, I think that thing Kim is showing off actually is toilet paper:
Disposable toilet paper is a relict of the twentieth century.
Markus
To be stupid is like to be dead. Oneself will not be aware of it.
It's only the others who suffer.
To be stupid is like to be dead. Oneself will not be aware of it.
It's only the others who suffer.
Re: Drum sander - finishing touches.
I agree Markus but that stuff in your image is far to fine, 'real' men use easy clean 40 grit.charangohabsburg wrote: Disposable toilet paper is a relict of the twentieth century.
Cheers
Kim
- charangohabsburg
- Blackwood
- Posts: 1818
- Joined: Sat Oct 16, 2010 1:25 am
- Location: Switzerland
Re: Drum sander - finishing touches.
I also agree with you Kim, but it also depends on the desired finish. Do you use only one grit?Kim wrote:I agree Markus but that stuff in your image is far to fine, 'real' men use easy clean 40 grit.charangohabsburg wrote: Disposable toilet paper is a relict of the twentieth century.
Cheers,
Markus
To be stupid is like to be dead. Oneself will not be aware of it.
It's only the others who suffer.
To be stupid is like to be dead. Oneself will not be aware of it.
It's only the others who suffer.
- Taffy Evans
- Blackwood
- Posts: 1000
- Joined: Wed Apr 30, 2008 6:54 pm
- Location: Charters Towers North Queensland
Re: Drum sander - finishing touches.
charangohabsburg wrote:I also agree with you Kim, but it also depends on the desired finish. Do you use only one grit?Kim wrote:I agree Markus but that stuff in your image is far to fine, 'real' men use easy clean 40 grit.charangohabsburg wrote: Disposable toilet paper is a relict of the twentieth century.
Cheers,
Yes Markus, just a brisk firm rub with the one course grit and then a good manly douche with lacquer thinners to finish off..had to forgo wearing nylon underpants though because they can melt if you stand up too quickly as can happen after a good manly douche with thinners.
Cheers
Kim
- Bob Connor
- Admin
- Posts: 3132
- Joined: Mon Jul 09, 2007 9:43 pm
- Location: Geelong, Australia
- Contact:
- charangohabsburg
- Blackwood
- Posts: 1818
- Joined: Sat Oct 16, 2010 1:25 am
- Location: Switzerland
Re: Drum sander - finishing touches.
3x
Kim, I didn't know yet the thinner technique. Thanks for passing on the trade secret.
Thanks Bob for this one. It seems to exist since some time back.
Kim, I didn't know yet the thinner technique. Thanks for passing on the trade secret.
Thanks Bob for this one. It seems to exist since some time back.
Markus
To be stupid is like to be dead. Oneself will not be aware of it.
It's only the others who suffer.
To be stupid is like to be dead. Oneself will not be aware of it.
It's only the others who suffer.
Re: Drum sander - finishing touches.
So, I just put paper on the drum and used it for the first time. Ran through a small piece of Monteray Cypress
(tenor uke size). Went well - my god the time I will save. There were a couple of small gouges - very noticable, but when I checked them on the dial gauge they were only .05 of a milimetre. Very mimimal. At first I thought it was due to the fact that I wasn't able to get the drum perfectly round, but I'm pretty sure it's a question of technique. A slightly stop/start action when feeding timber through.
At the moment I have used Alistair's method of putting a couple of staples either end. I am only using paper rolls now, but have some cloth-backed stuff coming - saffer in the long run I reckon.
Thanks for all the tips guys
Paul
Re: Drum sander - finishing touches.
A simple method for truing the drum is to first remove the abrasive and make certain it is in horizontal alignment with the table and the table is well supported and cannot flex. Once you are confident that is in order, you then feed a sheet of melamine through the machine that is a bit wider than the drum and to which abrasive, say 80 grit, has been glued down flat with contact adhesive (this abrasive covered board will come in 'very' handy for later use as a wide sanding board so it is not a waste).pavliku wrote: At first I thought it was due to the fact that I wasn't able to get the drum perfectly round, but I'm pretty sure it's a question of technique. Paul
Run the melamine through the machine repeatedly so that the drum only 'just' makes contact with the abrasive and repeat on that setting until hardly any contact is being made with the spinning drum. Adjust the sander just a tad to bring the abrasive back in contact and go again until you are confident that the entire width of the drum has been machined a little by the abrasive...maybe a red felt pen run across the drum while it is turned by hand before you start the operation would provide a good visual indicator.
Cheers
Kim
-
- Blackwood
- Posts: 414
- Joined: Sun Oct 26, 2008 2:27 pm
- Location: Melbourne (Ringwood), Australia
Re: Drum sander - finishing touches.
I have a suggestion for your feed technique on a home made unit where you are the material feeder. I have used a home made for the last 5 years and found it pretty hard to avoid even momentary stop/start at some stage during a pass, particularly for larger pieces like tops and backs. In some cases I did not see evidence of this until I got into the finishing stages. In the end my solution was to create a type of sled that the stock sat on and a 2mm stop glued to the end of the sled. I put a handle on the sled and I found I had much better control over maintaining a steady feed speed. I have a wide sled for tops and backs and a narrow one for sides, and other skinny stuff like bindings. The main down side of the sled is that the dust extraction is not quite as effective because there are bigger gaps around the stock, but it still worked adequately.pavliku wrote:So, I just put paper on the drum and used it for the first time. Ran through a small piece of Monteray Cypress
(tenor uke size). Went well - my god the time I will save. There were a couple of small gouges - very noticable, but when I checked them on the dial gauge they were only .05 of a milimetre. Very mimimal. At first I thought it was due to the fact that I wasn't able to get the drum perfectly round, but I'm pretty sure it's a question of technique. A slightly stop/start action when feeding timber through.
At the moment I have used Alistair's method of putting a couple of staples either end. I am only using paper rolls now, but have some cloth-backed stuff coming - saffer in the long run I reckon.
Thanks for all the tips guys
Paul
Having said that, I recently bought the Carbatec unit using the proceeds of the last guitar sale. But I will keep my home made job because I can do things with it that I can't do with the Carbatec unit. eg. free sanding on the drum, thickness sanding back of the headstock, saddles, nuts etc. (I don't have a belt sander)
Cheers. Frank.
Re: Drum sander - finishing touches.
Thanks Kim and Frank,
Kim, I will try your method of passing the sand paper through - I'll probably use a piece of tin, as thats what I have already in the shed. I had been raising the bed with sandpaper attached - the end with the pulley is a little off - I spent a lot of time trying to level it. I used it to thickness some matai for tenort uke sides just now - Does need a little fine tuning - but even as it is I'll save myself days of hard work.
Frank, I had seen a picture of what you are describing when doing research for this build. I think I will have to make a few jigs like that - especially for larger pieces of wood and bindings, etc.
The pieces of matai I just put through don't have those width wide gouges I described above - it was deffently due to the stop/start action.
Thanks Guys
Paul.
Re: Drum sander - finishing touches.
Kim wrote:A simple method for truing the drum is to first remove the abrasive and make certain it is in horizontal alignment with the table and the table is well supported and cannot flex. Once you are confident that is in order, you then feed a sheet of melamine through the machine that is a bit wider than the drum and to which abrasive, say 80 grit, has been glued down flat with contact adhesive (this abrasive covered board will come in 'very' handy for later use as a wide sanding board so it is not a waste).pavliku wrote: At first I thought it was due to the fact that I wasn't able to get the drum perfectly round, but I'm pretty sure it's a question of technique. Paul
Run the melamine through the machine repeatedly so that the drum only 'just' makes contact with the abrasive and repeat on that setting until hardly any contact is being made with the spinning drum. Adjust the sander just a tad to bring the abrasive back in contact and go again until you are confident that the entire width of the drum has been machined a little by the abrasive...maybe a red felt pen run across the drum while it is turned by hand before you start the operation would provide a good visual indicator.
Cheers
Kim
+1 for Kim. I don't recall your materials, but if your drum is timber, you will get some movement with humidity changes. I retrue, as above, each time I change paper.
That said, a slight wobble will not cause gouges. For me these always come from problems with inconsistent manual feeding.
practice, practice
Regards
Alastair
Alastair
Who is online
Users browsing this forum: No registered users and 79 guests