Possible my best recycled machine/bridge slotting

Talk about musical instrument construction, setup and repair.

Moderators: kiwigeo, Jeremy D

Post Reply
User avatar
Taffy Evans
Blackwood
Posts: 1000
Joined: Wed Apr 30, 2008 6:54 pm
Location: Charters Towers North Queensland

Possible my best recycled machine/bridge slotting

Post by Taffy Evans » Tue Jul 28, 2009 10:12 am

I had promised to show what I call my Multivise a long time ago. The reason I have not is that it does/aids in so many jobs I could not show it all. But this week I was building some bridges and took photos as I went because I was, after 25 odd years modifying it [again].

I will also show my process of making my bridges, possible nothing new here but Ill show it anyway as it leads into the role of the Multivise.

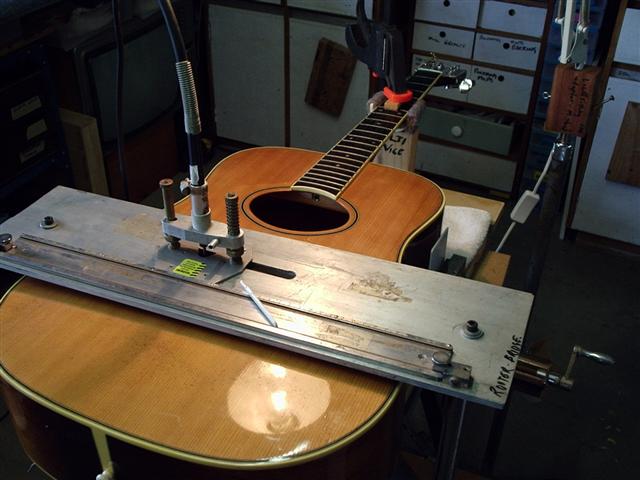
The Multivise started out life as an engraving tool. It had 100’s of brass plate with different letters on them. These were placed in a jig and a pantograph type of operation copied this on to the item being engraved. For me it will hold any instrument from a violin to a double bass, with the selection of jigs I have made. So let me start with the bridge part of its function. Let me say that if you don’t have one of these little jiggers in the back shed, then Allen’s post on bridge slotting is ideal.
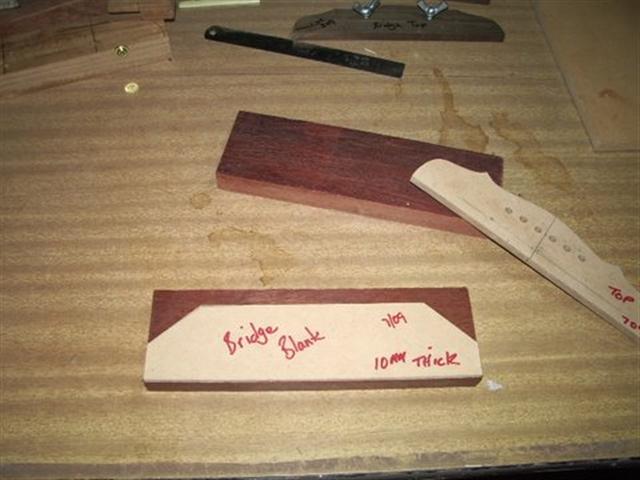

Image
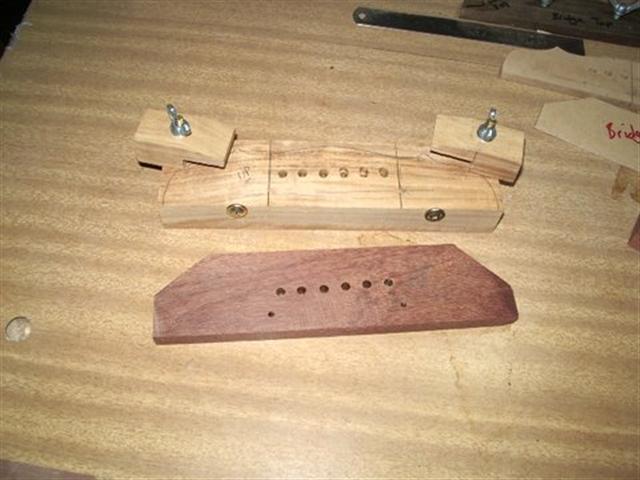
1- Shows bridge blank and template for marking.

Image
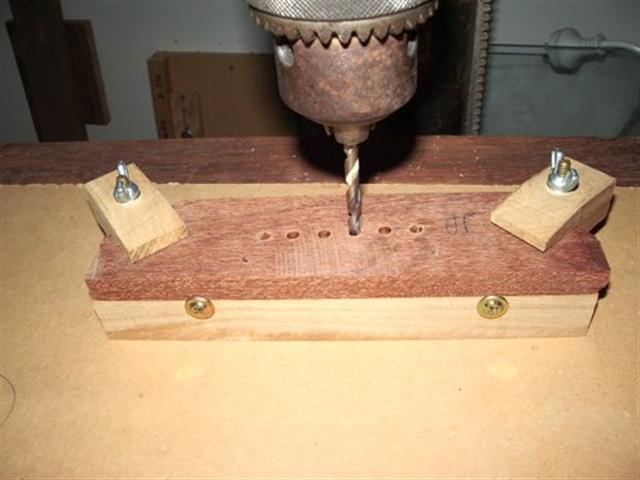
2- Blank cut to fit into drilling jig, the underside if this jig has the holes that locate into a pin in my drill presses adapter table
Image
3- Assembly in drill press pin lined up with drill bit. I drill the pin holes and two holes, one each end of the saddle slot position. For different compensation I would use a different jig.
Image
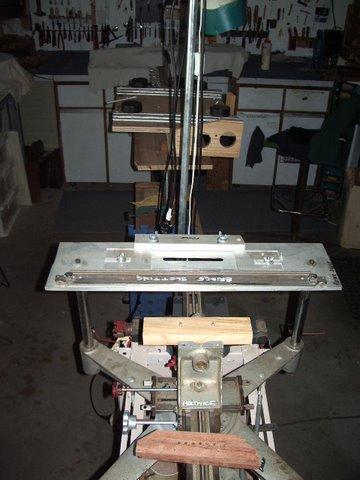
4- Show the prepared blank with bridge holder sitting in the jaws of the machine. I found that I did not need the bridge holder as I can put the blank in the jaws themselves, they have a ledge that will support the blank from underneath and then of course clamped from the sides.
Image
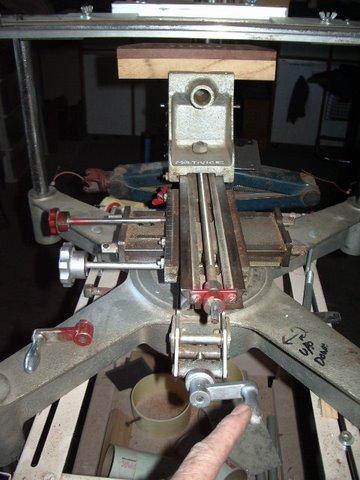
5- This the knob that winds the assembly back under the router table, the knob in front of that locks the assembly
Image
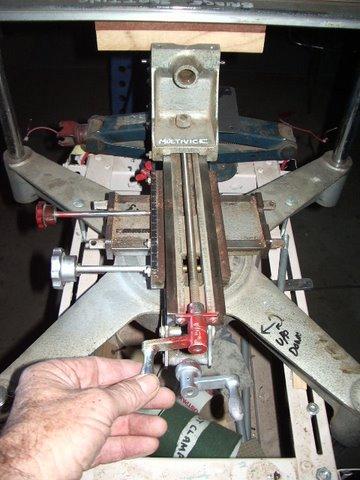
6- This handle winds the vise with the blank up under the table, so setting the height in small increments as I router. Far quicker with finer tuning than changing the router base
Image
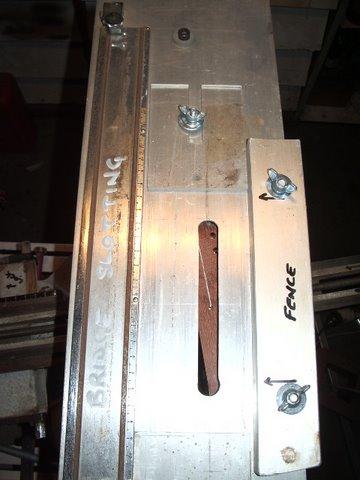
7- Shows the handle that winds the vise jaws in and out. The carriage on which the jaws travel is seen in the foreground with the threaded screw, this is the same on the other side so you can imagine how wide these jaws will open.
Image
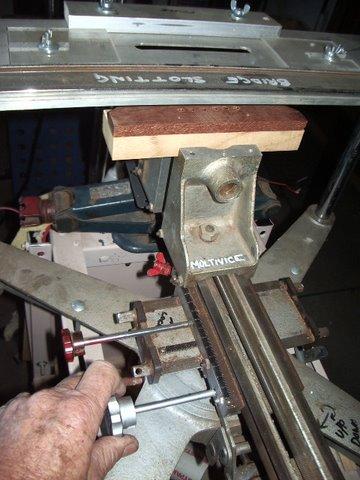
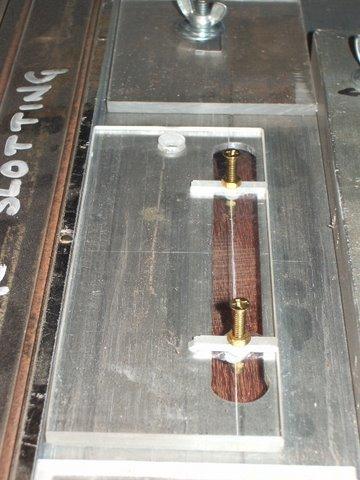
8- This shows the blank under the table, at the wrong angle of course. This is the beauty of this devise I can change the compensation angle at will. Not only can I slide the jaws from side to side under the table, the whole vise assembly can rotate a full 360 deg.
Image
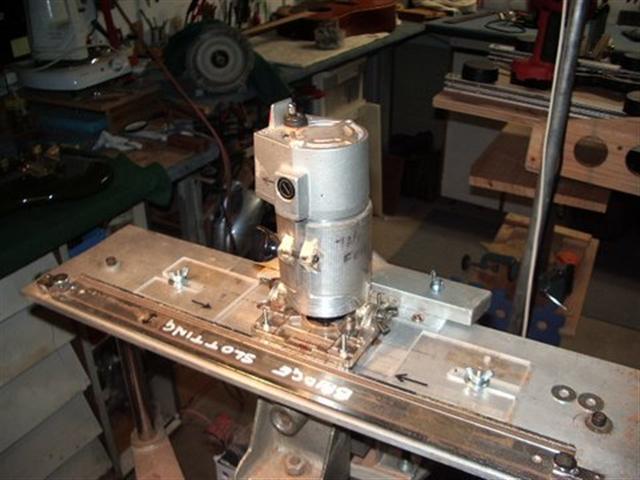
9- I then place my saddle line up jig on the table, slide the bridge into position in the jaws and swing the carriage to the compensation angle indicated by the two hole in the blank.
Image
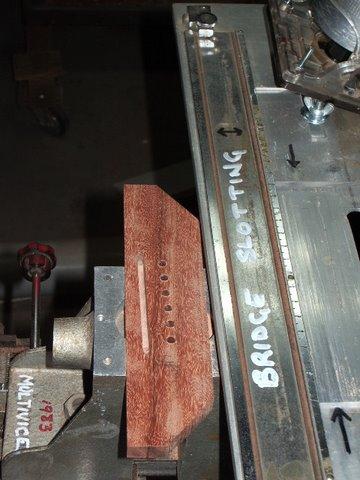
The routing process is one pass between the Perspex stops, raise vise, another pass and so on until the desired depth it reached
Image
Image
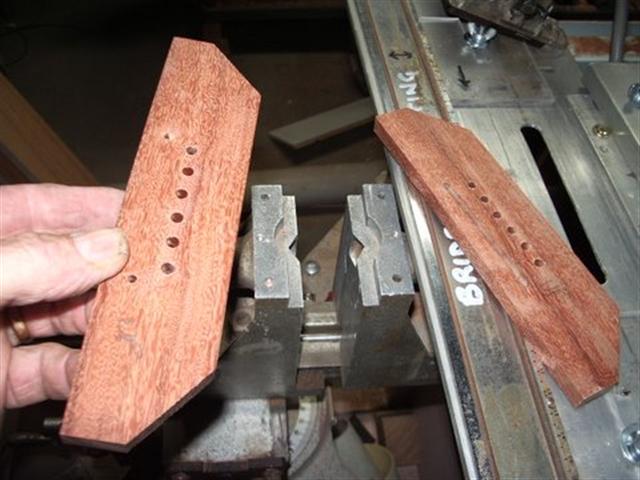
Wined down and out the slotted blank, open the jaws and in with the new one, repeat the process above.
Image
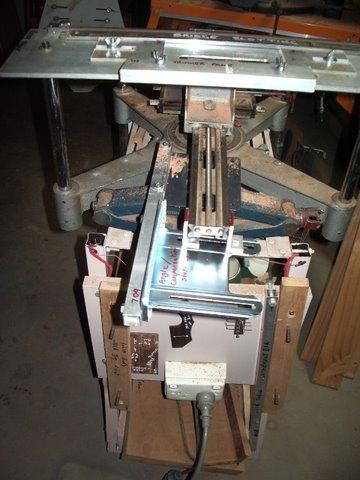
13- This shows the other side of the Multivise. I’ve fitted a devise here to hold the compensation angle when the assembly is unclamped and raised to deepen the slot cut.

Well that’s the Multivise, I love it. I might as well carry on with the bridge process; somebody new may get something out of it.
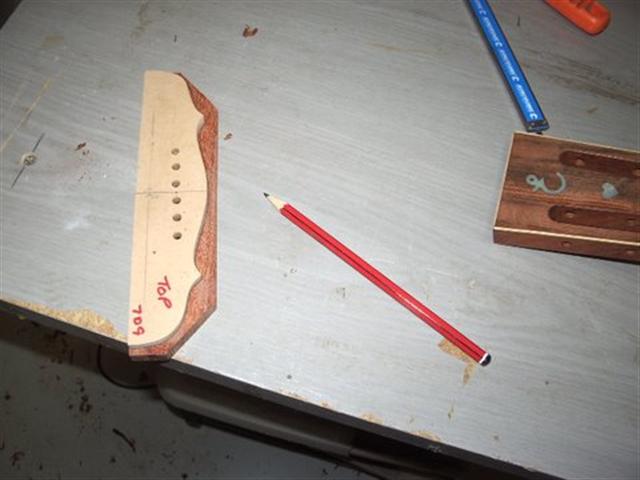
Image
14- Marking the bridge outline

Image
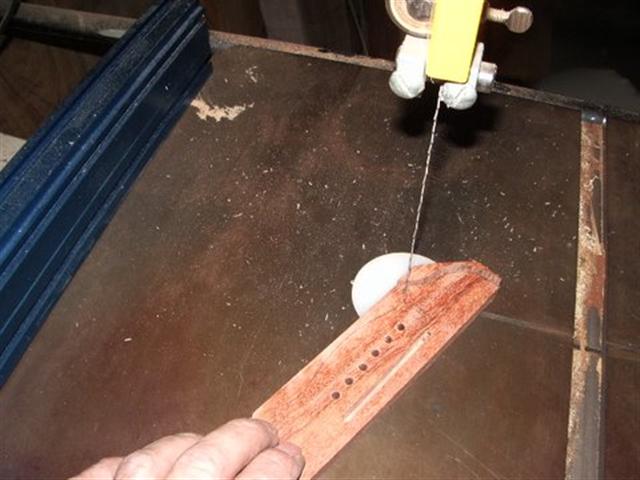
15- Bandsaw the shape

Image
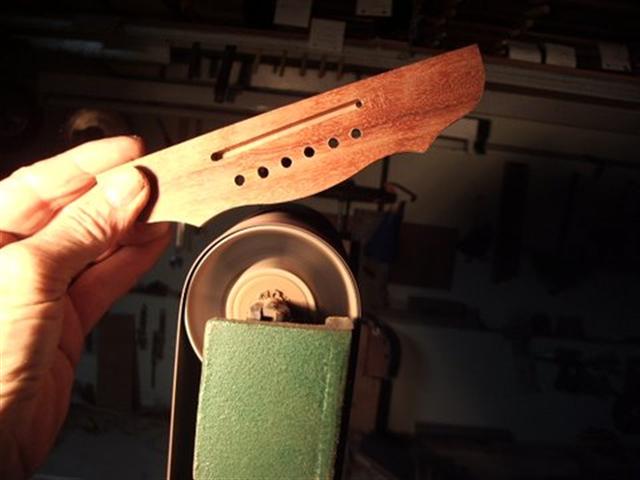
16- Sand to the line

Image
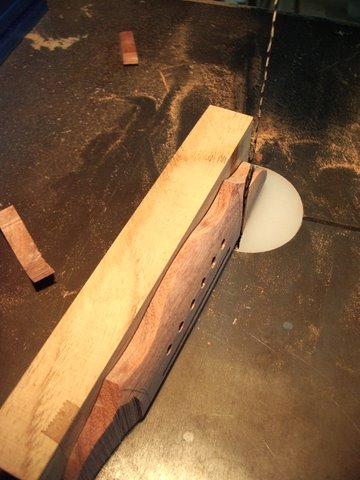
17- Bandsaw the wings

Image
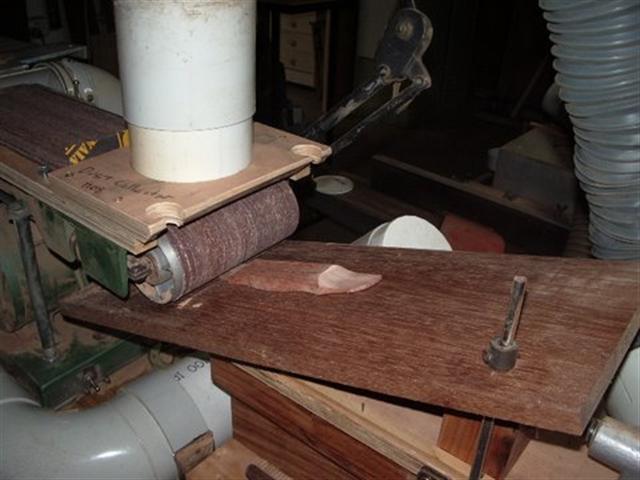
Sand the wings

Image
From then on it’s hand carving to get the bulk off and lighten the bridge
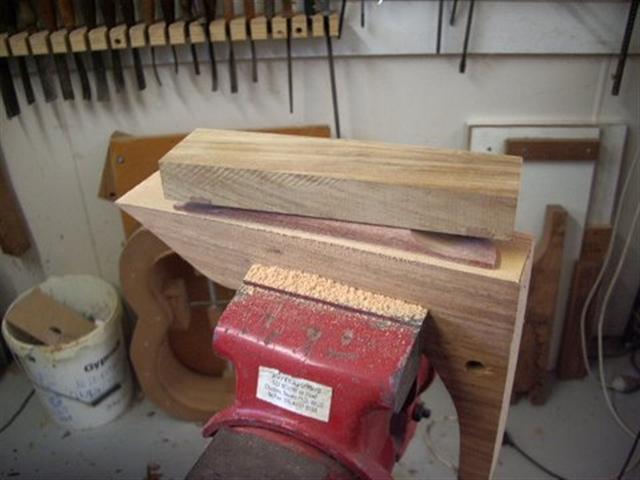
Image
Using my radius block to get the bridge base to match the top radius. The block of wood is seen at times though out the build it has two metal pins in it that locate in the bridge pin hole for easier handling.
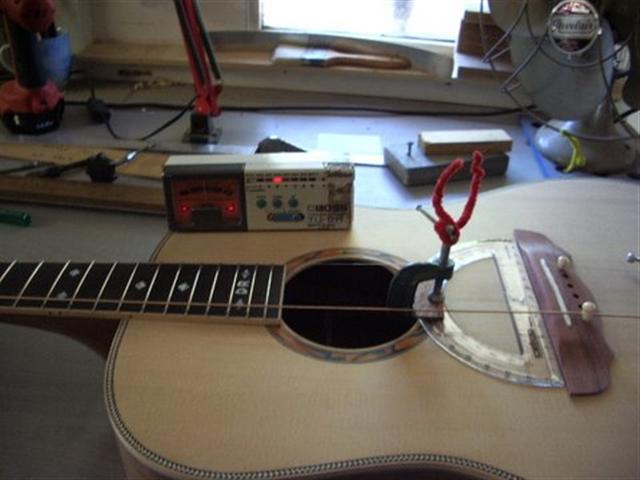
Image
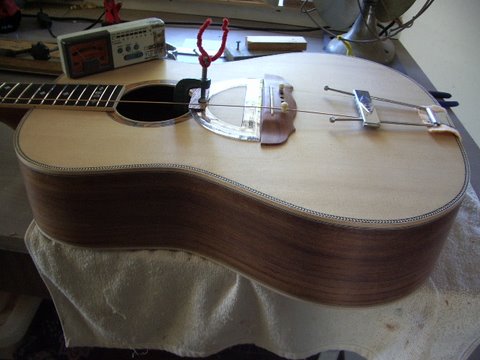
21- Checking the intonation, plotting bridge position….looks like I got it right.
Took me two cups of coffee to do this presentation, hope you enjoy.
Taff

User avatar
Nick
Blackwood
Posts: 3643
Joined: Thu Feb 26, 2009 11:20 am
Location: Christchurch, New Zealand
Contact:

Post by Nick » Tue Jul 28, 2009 10:28 am

:cl :cl :cl :cl :cl :cl :cl :cl Brilliant, Thanks Taff! You make bridges look simple and have some nice solutions to problems, as in your block to hold the bridge whilst sanding the bum. The vise certainly looks a versatile & extremely handy unit. :)
"Jesus Loves You."
Nice to hear in church but not in a Mexican prison.

User avatar
Allen
Blackwood
Posts: 5252
Joined: Thu Oct 11, 2007 5:39 pm
Location: Cairns, Australia
Contact:

Post by Allen » Tue Jul 28, 2009 6:26 pm

Great stuff Taffy.

Can you explain further what you are doing plotting the bridge position with the strobe tuner. Bridge glued down I'm presuming?
Allen R. McFarlen
https://www.brguitars.com
Facebook
Cairns, Australia

User avatar
Taffy Evans
Blackwood
Posts: 1000
Joined: Wed Apr 30, 2008 6:54 pm
Location: Charters Towers North Queensland

Post by Taffy Evans » Tue Jul 28, 2009 7:29 pm

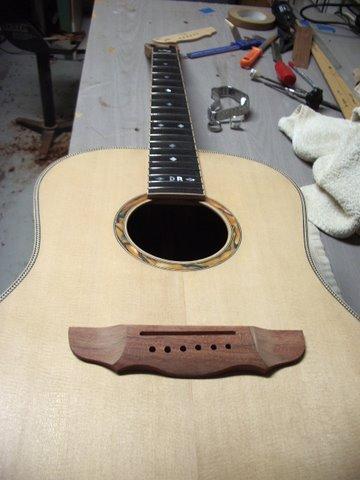
Hi Allen. No the bridge is not glued down at this stage, it sits on the top and I use a tailpiece and with the tuners fitted in place the two E strings are tuned up. I use a wide saddle and can fine tune later after the bridge is glued on. The photo shows the set up.

Image

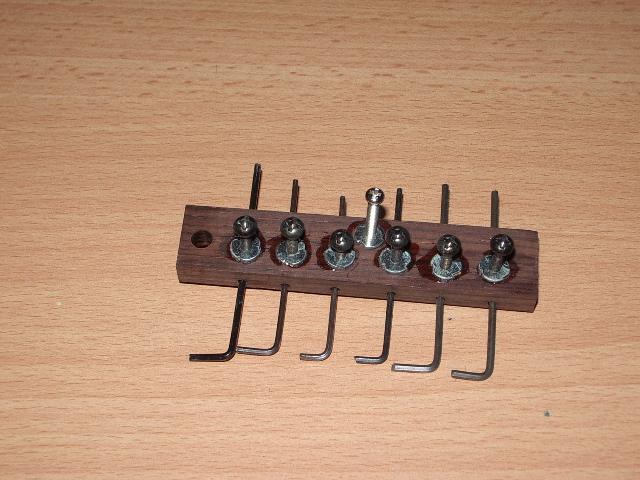
Or using the Multivice route the slot after the bridge is glued to the guitar after plotting the saddle position using the above set up and a bridge intonator also pictured below.
Image
Image
I prefer the unglued bridge method, but would still use the intonator to lay out the saddle position if I was using a different scale length for instance.
Taff

User avatar
kiwigeo
Admin
Posts: 10617
Joined: Sat Sep 29, 2007 5:57 pm
Location: Adelaide, Sth Australia

Post by kiwigeo » Wed Jul 29, 2009 6:29 am

I like the use of the tailpiece....brilliant.

User avatar
Localele
Moderator
Posts: 373
Joined: Tue Aug 12, 2008 6:54 am
Location: Corndale,NSW
Contact:

Post by Localele » Wed Jul 29, 2009 6:39 am

Consider most of those ideas 'STOLEN" thanks Taffy.It is always amazing that what some people take for granted (you solve a problem for your tools and conditions ) can then provide so much help to others who may have been on a different track trying to get to the same place.
Cheers from Micheal.

Remember the "5P Rule".
Preparation Prevents Piss Poor Performance.

Hesh1956
Blackwood
Posts: 1420
Joined: Thu Sep 27, 2007 9:58 am

Post by Hesh1956 » Wed Jul 29, 2009 7:42 am

I was going to post the word brilliant too but at least two of you beat me to it. So I'll just say that I see a lot of genius in your work Taff my friend!

Ricardo
Sassafras
Posts: 46
Joined: Wed May 06, 2009 9:00 pm
Location: Brisbane

Post by Ricardo » Wed Jul 29, 2009 5:59 pm

I noticed you have 2 holes left in the bridge slot, does this affect the sound, I thought the aim was to get as much contact from the saddle to the bridge as possible. Refer to Extract By E Somogyi
"The saddle, in addition to helping to create the strings’ downward push, is an important coupling mechanism between the strings and the guitar face. If you do nothing to the guitar except change the saddle from a tight fit to a loose fit, you will absolutely lose volume. The fit is critical. Physicists have found that the guitar is a very inefficient sound-producing system. On the average, for each stroke of the strings, about 95% of the kinetic energy thus generated goes to mechanical vibration and is also dissipated as heat and friction. Only about 5% of the moving energy of the strings becomes sound — and if you lose some of this energy at the saddle you will get a disproportionate loss to the instrument. I am concerned that the material the saddle is made of be noncompressible, hard and stiff. I don’t use plastic because I feel it will absorb and damp some of the string vibrational energy. I’ve almost always used bone, except at one point where I was using melamine from cut-up dinner plates."

I would like to hear your vies on this and if it something you have changed or always done, and if you have noticed changes to sound because of it.

User avatar
Taffy Evans
Blackwood
Posts: 1000
Joined: Wed Apr 30, 2008 6:54 pm
Location: Charters Towers North Queensland

Post by Taffy Evans » Wed Jul 29, 2009 9:26 pm

Hi Ricardo, thanks for your input and I agree with what you have put forward.
What I showed was just the making of my bridges and using the Multivice.
If I had gone on to the fitting of the bridge you would have seen two small holes in the top in the saddle position that line up with the holes in the bridge. I fit two small rosewood dowels into the bottom of the bridge just protruding enough to act as locating lugs for the gluing process. This would I hope overcome the issues you pointed out. I also only use bone, unless a piezo under saddle pickup is fitted, then I may use a plastic type saddle if the sound is going to be too bright.
I feel the saddle fit, hight and material, the break angle of the strings to the peg holes, the peg material, bridge thickness and wood used and the fingerboard nut all play their part in the quest for good volume and tone.
Taff

Post Reply

Who is online

Users browsing this forum: Google and 75 guests