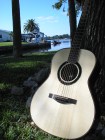
Instead I've started on making 2 identical guitars but with different tops, so I can get a better feeling of what I can expect from the different tops.
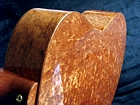
I'm using some more spalted avocado for the rosette. The tops are Australian Cedar and Engelman Spruce. The back sides will be some perfectly 1/4rd Queensland Walnut.

First up, routing out some purfling channels in the rosette blank.

Cutting some purfling strips from veneer
.

Inlaid and glued in with rather thin hide glue. I usually use CA for this, but ran out and didn't feel like going out to the hardware store. It was 35 today and the sun would take your hide off.

Inlaid and leveled.