A major disaster
-
56nortondomy
- Blackwood
- Posts: 676
- Joined: Sat Jan 14, 2012 11:56 pm
- Location: Melbourne western suburbs
A major disaster
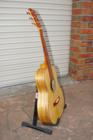
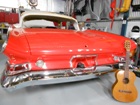
I've just had a disaster with a guitar i'm building, droped a measuring jug on the top and smashed it. Is it possible to take the top off and replace it? Any advice welcome. Wayne
- Attachments
-
-
-
charangohabsburg
- Blackwood
- Posts: 1818
- Joined: Sat Oct 16, 2010 1:25 am
- Location: Switzerland
Re: A major disaster
aarrrrghhh! Not a nice view.56nortondomy wrote:I've just had a disaster with a guitar i'm building, droped a measuring jug on the top and smashed it.
Of course yes. How not?56nortondomy wrote:Is it possible to take the top off and replace it?
I suppose you used an outside mould to build the box, so put it back in that mould and, if you used water soluble glue for gluing the binding on you can get it off with steam and a small spatula (I have done that, works like a charm), or if you used any "more permanent" glue you can rout the binding off ( I think John the Woodrat has done the second one).
I in your situation would save the most possible surface of the intact part of the top and probably later build an odd shaped guitar, the kind which have sort of a "cutaway" right at the spot where your guitar got damaged, to place the guitar with the lower treble bout side on the leg (or just to make it look "interesting"?) can't find a picture of these odd models right now.
Is this top redwood? (I am just curious). It is too nice to fire up the pizza oven...
Markus
To be stupid is like to be dead. Oneself will not be aware of it.
It's only the others who suffer.
To be stupid is like to be dead. Oneself will not be aware of it.
It's only the others who suffer.
-
56nortondomy
- Blackwood
- Posts: 676
- Joined: Sat Jan 14, 2012 11:56 pm
- Location: Melbourne western suburbs
Re: A major disaster
Sinker redwood Markus, thanks for the advice, i might try the steam, sounds good. Wayne
-
charangohabsburg
- Blackwood
- Posts: 1818
- Joined: Sat Oct 16, 2010 1:25 am
- Location: Switzerland
Re: A major disaster
Here some pictures from my charango build-and-repair thread about how I removed part of a top (plus fretboard) with steam (with one of those bathroom mirror steamers).56nortondomy wrote: thanks for the advice, i might try the steam, sounds good.
The start is the trickiest part:
etc. ...
The binding was glued on with hide glue, the top with Titebond original, and everything came off pretty clean.
As I already mentioned I think it will be a good idea to have your guitar in the mould from the beginning until the new top will be on again because its sides are not that sturdy as this 6mm thick charango bowl.
Good luck!
Markus
To be stupid is like to be dead. Oneself will not be aware of it.
It's only the others who suffer.
To be stupid is like to be dead. Oneself will not be aware of it.
It's only the others who suffer.
-
Trevor Gore

- Blackwood
- Posts: 1609
- Joined: Mon Jun 20, 2011 8:11 pm
Re: A major disaster
Love that vise, Markus!
Wayne, that's a total bummer.
I've taken the tops of my research guitars a few times and it's no big deal. When the new one is on, no one would know that the guitar has been re-topped. To a degree, it depends what your internal structure is like, but the principal is much the same, regardless. First thing is take the neck off, but as you've not got to that stage, no problem. On my guitars it's easy because they have bolt-on, bolt off necks, so no un-gluing is involved. The next step sounds worse than it is, but just drill a hole in the top and then run around the inside of the linings/end blocks with a jigsaw. You won't even have to drill a hole! No need to be particularly precise, just don't cut into the the chassis. Then clean the rest off the linings/end blocks using a block plane. This should get you really close, ready for the new top, but a touch up in a sanding dish (spherical radius dish, presuming you use them) with the box in the mould will get you spot on. If you let any braces into the linings, just saw/chisel the old ones out in the normal way, ready to accept the new ones. Glue on the new top, and do the binding and purfling as usual. Once you decide to scrap the old top, this procedure is way quicker than trying to save bindings, purflings, etc. and gives a neater outcome. Getting the old top off and cleaning up takes about 10 minutes.
If you have a fancy butt strip going on, with odd angle mitres (hard to see exactly, from your pics) and want to keep those, when you rout for the new bindings rout so as to keep the side purflings. I've left up to a couple of millimetres of binding in their, too and with dark wood bindings its almost impossible to see that there are two binding strips on there.
I know that some people have routed around the inside of the purfling and dropped a new top in but that takes some real precision to make it look good and takes much longer fitting everything up.
Good luck!
Fine classical and steel string guitars
Trevor Gore, Luthier. Australian hand made acoustic guitars, classical guitars; custom guitar design and build; guitar design instruction.
Trevor Gore, Luthier. Australian hand made acoustic guitars, classical guitars; custom guitar design and build; guitar design instruction.
-
woodrat
- Blackwood
- Posts: 1155
- Joined: Tue Nov 25, 2008 6:31 am
- Location: Hastings River, NSW.
- Contact:
Re: A major disaster
Hi Wayne....I have done a couple exactly they way Trevor described in his post above....you might like to have a look at some pictures of my little "save" after I had a wee accident......
viewtopic.php?f=1&t=4181&hilit=Blackwood+OM+rebuild
Hope it helps you see the way forward...
John
viewtopic.php?f=1&t=4181&hilit=Blackwood+OM+rebuild
Hope it helps you see the way forward...
John
"It's never too late to be what you might have been " - George Eliot
-
56nortondomy
- Blackwood
- Posts: 676
- Joined: Sat Jan 14, 2012 11:56 pm
- Location: Melbourne western suburbs
Re: A major disaster
I remember reading that John in your original post. Thanks Trevor for the advice, i think i'll do it your way, but i'll wait until i get a new top. If i make a good save i'll post some photos. Thanks again Trevor and John, you too Markus. Wayne
Re: A major disaster
OUCH!! Wayne... What happened next?, fright or flight?? fright being, a full lung gasp of air, held in till eye's bulge, hands clasp wobbling head with vice grip, eyes glued tightly shut...or, flight...briskly pacing workshop floor, darting death looks at said damaged box, growling precise profanities at the four point's of the compass & then bolting to puter for ANZLF'ers comforting support...for me all of the above!!!! My only saving grace for you Wayne, when you dissect that totally damaged top,send it up to me in Brisvegas & I'll fit it to a ukuerie box, It'll take the pain away, & I promise I'll post pic's to the forum 
Gaz
Gaz
-
56nortondomy
- Blackwood
- Posts: 676
- Joined: Sat Jan 14, 2012 11:56 pm
- Location: Melbourne western suburbs
Re: A major disaster
Well Gaz, i'd gladly let you have it, but i think it won't be much chop after i take it off, and besides that it's a small body guitar so i don't think it will be big enough even for a uke. I was pretty calm after it happened, because i wasn't totally happy with it, so now's my chance to make it better, not too happy about the financial side of this stuff up though. Just ordered a new top from RC tonewoods. Wayne
-
woodrat
- Blackwood
- Posts: 1155
- Joined: Tue Nov 25, 2008 6:31 am
- Location: Hastings River, NSW.
- Contact:
Re: A major disaster
Gaz, I find that what you describe wastes too much energy....quietly crying in the corner takes much less effort!Gazm wrote:OUCH!! Wayne... What happened next?, fright or flight?? fright being, a full lung gasp of air, held in till eye's bulge, hands clasp wobbling head with vice grip, eyes glued tightly shut...or, flight...briskly pacing workshop floor, darting death looks at said damaged box, growling precise profanities at the four point's of the compass & then bolting to puter for ANZLF'ers comforting support...for me all of the above!!!! My only saving grace for you Wayne, when you dissect that totally damaged top,send it up to me in Brisvegas & I'll fit it to a ukuerie box, It'll take the pain away, & I promise I'll post pic's to the forum
Gaz
You Know Who
"It's never too late to be what you might have been " - George Eliot
-
Dennis Leahy

- Blackwood
- Posts: 872
- Joined: Wed Oct 10, 2007 12:32 am
- Location: Duluth, MN, US
- Contact:
Re: A major disaster
Any thoughts at all of creating a patch that looks like an inlay? If you don't go crazy with cleats on the backside, I'll bet it won't sound noticeably different than what it would have sounded like.
If you try a patch (not a "hidden" patch, that would be impossible in this top), and you don't like the sound of the guitar (or hate the look of the "inlay"), THEN rip it off and start over.
How about inlaying a shark coming up through the top, teeth first (a surfer's nightmare?)
Dennis
If you try a patch (not a "hidden" patch, that would be impossible in this top), and you don't like the sound of the guitar (or hate the look of the "inlay"), THEN rip it off and start over.
How about inlaying a shark coming up through the top, teeth first (a surfer's nightmare?)
Dennis
Another damn Yank!
-
charangohabsburg
- Blackwood
- Posts: 1818
- Joined: Sat Oct 16, 2010 1:25 am
- Location: Switzerland
Re: A major disaster
Could someone enlighten me what's the point of removing the top with a jig saw (losing quite a few millimetres of precious wood that one maybe wishes to be a bit bigger for further use) - if one afterwards has to remove the binding carefully anyway? This means to do the job twice! 
Thanks Trevor. It turned out to be much more useful than I thought it would be when I built it.trevtheshed wrote:Love that vise, Markus!
Markus
To be stupid is like to be dead. Oneself will not be aware of it.
It's only the others who suffer.
To be stupid is like to be dead. Oneself will not be aware of it.
It's only the others who suffer.
Re: A major disaster
I think Trevor is talking about cutting from the top, just inside the linings.
Then plane off the remainder down to just touch the linings, install new soundboard and rout for bindings as usual, removing the remains of the old in the process,
Then plane off the remainder down to just touch the linings, install new soundboard and rout for bindings as usual, removing the remains of the old in the process,
-
Bob Connor

- Admin
- Posts: 3132
- Joined: Mon Jul 09, 2007 9:43 pm
- Location: Geelong, Australia
- Contact:
Re: A major disaster
if you install your bindings with a router just use that jig to rout the top off.
Regards
Regards
-
charangohabsburg
- Blackwood
- Posts: 1818
- Joined: Sat Oct 16, 2010 1:25 am
- Location: Switzerland
Re: A major disaster
Yes, that's what I meant with "losing some millimetres". I'm a curmudgeon.jeffhigh wrote:I think Trevor is talking about cutting from the top, just inside the linings.
Makes sense, thank you Jeff.jeffhigh wrote:Then plane off the remainder down to just touch the linings, install new soundboard and rout for bindings as usual, removing the remains of the old in the process,
Markus
To be stupid is like to be dead. Oneself will not be aware of it.
It's only the others who suffer.
To be stupid is like to be dead. Oneself will not be aware of it.
It's only the others who suffer.
-
Trevor Gore
- Blackwood
- Posts: 1609
- Joined: Mon Jun 20, 2011 8:11 pm
Re: A major disaster
I've never tried to re-purpose a top because by the time the damage is cut away, the top you have left would be for an instrument where the existing sound hole would be too big.charangohabsburg wrote:Could someone enlighten me what's the point of removing the top with a jig saw (losing quite a few millimetres of precious wood that one maybe wishes to be a bit bigger for further use) - if one afterwards has to remove the binding carefully anyway?
The bindings are not removed and reused using the jigsaw method, they are just machined away when routing the new binding channels. You can save the side purfling and butt strip mitres (which might otherwise mean re-doing the butt strip) by routing shallow down the sides, even leaving some of the original binding above the side purfling. Un-purfled bindings are then installed and on dark woods it is very hard to see the join between the old and new bindings, if done well.
John (Woodrat) has pictures of how he did it, and Jeff's comments are accurate. Attached is a picture of one of my re-topped research guitars, where you can see the two levels of binding. I didn't try to match the woods particularly on this one; I just used the next available binding strips.
- DSCF4235s.jpg (97.98 KiB) Viewed 20616 times
Fine classical and steel string guitars
Trevor Gore, Luthier. Australian hand made acoustic guitars, classical guitars; custom guitar design and build; guitar design instruction.
Trevor Gore, Luthier. Australian hand made acoustic guitars, classical guitars; custom guitar design and build; guitar design instruction.
-
Taffy Evans
- Blackwood
- Posts: 997
- Joined: Wed Apr 30, 2008 6:54 pm
- Location: Charters Towers North Queensland
Re: A major disaster
I would try the inlay method, It's got me out of the poo a few times in the past, also this week in fact after a sleepless night. In the pic posted here the top was not worth saving so I routed inside the purfling through the top and fitted new top inside the old purfling.
- P3050045 (Small).JPG (45.39 KiB) Viewed 20517 times
- P4070019 (Small).JPG (39.38 KiB) Viewed 20517 times
Taff
-
Trevor Gore
- Blackwood
- Posts: 1609
- Joined: Mon Jun 20, 2011 8:11 pm
Re: A major disaster
Nice chops, Taff.
If I had a style 40-odd, that's what I'd try first. But I try to avoid doing any type of repair work these days!
If I had a style 40-odd, that's what I'd try first. But I try to avoid doing any type of repair work these days!
Fine classical and steel string guitars
Trevor Gore, Luthier. Australian hand made acoustic guitars, classical guitars; custom guitar design and build; guitar design instruction.
Trevor Gore, Luthier. Australian hand made acoustic guitars, classical guitars; custom guitar design and build; guitar design instruction.
-
56nortondomy
- Blackwood
- Posts: 676
- Joined: Sat Jan 14, 2012 11:56 pm
- Location: Melbourne western suburbs
Re: A major disaster
Thanks Taffy, but i'm not sure i have the precision for your idea, i think i'll stick with Trevor's, it sounds pretty straightforward. Wayne

Re: A major disaster
Taff,
If you could briefly describe the fitting process for the new top Id be most appreciative. In particular Id like to know how you get the fit just right.
Cheers Martin
If you could briefly describe the fitting process for the new top Id be most appreciative. In particular Id like to know how you get the fit just right.
Cheers Martin
Martin
-
pat foster
- Myrtle
- Posts: 79
- Joined: Tue Apr 14, 2009 8:41 am
- Location: Eastern Washington, USA
- Contact:
Re: A major disaster
Here's a link from John Greven's web site showing the routing/inlaying method.
http://www.grevenguitars.com/retopping-demo.html
Pat
http://www.grevenguitars.com/retopping-demo.html
Pat
Re: A major disaster
Thanks Patpat foster wrote:Here's a link from John Greven's web site showing the routing/inlaying method.
http://www.grevenguitars.com/retopping-demo.html
Pat
Martin
-
56nortondomy
- Blackwood
- Posts: 676
- Joined: Sat Jan 14, 2012 11:56 pm
- Location: Melbourne western suburbs
Re: A major disaster
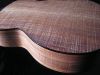
Finally managed to get the top replaced, had to wait for the weather to cool off so i could brace the new top. Pretty much followed Trevor's method, except for using a jigsaw, i didn't want to damage the internal soundboard ( should be infernal soundboard, it's been a pain in the arse. ). I used a hacksaw blade and exacto knife to cut the damaged top off, anyway it all went pretty smoothly and i'm happier with the new top. Thanks again to everyone for the advice. Wayne
- Attachments
-
-
-
-
-
-
EricDownunder
- Blackwood
- Posts: 170
- Joined: Wed Apr 18, 2012 12:59 pm
- Location: East Kurrajong, NSW
Re: A major disaster
I have never heard of a guitar with a internal soundboard! What does it achieve, volume, tone, I would really like to know more. The combination of bracing etc etc etc it's obvious you have spent a lot of time on this one and I'm sure it's going to be fantastic when your finished and the repair will be just a memory.
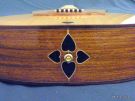
Is that a cat's paw for a sound hole?
Is that a cat's paw for a sound hole?
Keep Smiling,
Eric Smith
Eric Smith
-
56nortondomy
- Blackwood
- Posts: 676
- Joined: Sat Jan 14, 2012 11:56 pm
- Location: Melbourne western suburbs
Re: A major disaster
Yes it's a cat's paw Eric. Not sure what the internal s/board's supposed to achieve, i just build them like i'm asked, this guy has some unusual requests, first it was a kasha now this one, next one is going to have a raised fretboard and the one after that is a Selmer with a fanned fretboard, and also a fiddle kit from stewmac to put together for him, at least he's keeping me busy, repeat buisness gotta be good. Wayne
Who is online
Users browsing this forum: No registered users and 278 guests