Falcate Classical #2 Build (in NZ)

Talk about musical instrument construction, setup and repair.

Moderators: kiwigeo, Jeremy D

seeaxe
Blackwood
Posts: 768
Joined: Thu Dec 18, 2008 7:20 pm
Location: Auckland NZ

Falcate Classical #2 Build (in NZ)

Post by seeaxe » Sun Oct 11, 2020 1:36 pm

I have finally started on the second of two classical guitars using a falcate bracing system. This one will be a repeat of the last one save for any refinements I can think of on the way. I was pretty happy with the first try and its the best looking guitar I have built so far. The bracing was a success in terms of the frequencies I obtained but its was way stiffer than it should have been so I need to solve that puzzle. Trevor has pointed me in the right direction, I just need to figure out how I'm going to do it. Ill worry about that when I get to the soundboard.

As with the last one I am starting on the fiddly bits that I'm always tempted to short cut in the heat of the build process. Firstly the rosette. That was one of the many things I was really happy with on the last one and going to try and make this one just a little bit better.

The fretboard, neck blank and CF bridge are all made and I think I have all my hardware etc, so I should be able to make some decent progress over the summer when humidity levels drop to a little bit lower levels in Auckland

This one is going to be EI Rosewood and Engleman Spruce so more traditional woods. I'm going to try to bling things up a bit as otherwise I find that combination a little boring. This one will also have a bolt on neck a la fender. Feedback I am getting is that it is much better than having a heel. Off we go.
rosette starting.jpg
Richard

User avatar
WJ Guitars
Blackwood
Posts: 372
Joined: Thu Jan 26, 2017 4:28 pm
Location: Sutherland NSW
Contact:

Re: Falcate Classical #2 Build (in NZ)

Post by WJ Guitars » Sun Oct 11, 2020 2:37 pm

Looking forward to seeing this guitar build progress.

Wayne
https://wjguitars.wixsite.com/mysite-1

Dave M
Blackwood
Posts: 594
Joined: Tue Jul 15, 2014 6:44 am
Location: Somerset UK

Re: Falcate Classical #2 Build (in NZ)

Post by Dave M » Mon Oct 12, 2020 3:57 am

My falcate classicals were much too stiff. I have rather dodged it and gone to a traditional fan braced system but clearly it can be done successfully. We will enjoy following your experience. Dave
------------------
Dave

seeaxe
Blackwood
Posts: 768
Joined: Thu Dec 18, 2008 7:20 pm
Location: Auckland NZ

Re: Falcate Classical #2 Build (in NZ)

Post by seeaxe » Sun Nov 01, 2020 5:57 pm

Some progress made this weekend after a few nights faffing with the rosette mosaic block. Thats now done. Nearly 200 pieces of wood glued together.

Decided to repeat the laminated sides, was very happy with that last time, keeps the sides nice and flat and helps get the shape a better fit to the mould. When I've laminated in the past I have always had a few gaps, nothing serious and you cant see them but I knew they are there and it bugged me. So this time I spent a lot of time with the bending iron and got the laminates as near to perfect as I could, then glued them with epoxy and clamped the living daylights out of them. No gaps :) Lesson learned, take your time and get it right

I find lots of advantages to laminating the sides, in addition to the above. For a start I don't build frequently and bending on the iron always seems to take a while to get my mojo working (yes I am leaving it to heat up properly). So, starting on the inner laminate and using the not so expensive wood, generally very thin, got me back up to speed before I bent the rosewood. Plus with a little patience and care, you get rims that are the right shape with little or no spring to them. All helps for later stages.

While the iron was out I bent my linings and as I had already prepared a heap of them (cant remember when I did it) I have gone with laminated linings top and bottom, a bit wider at the top. The second set of top linings are curing in the mould and I have to the two bottom ones to glue up during the week.
mosaic block.jpg
macro laminate.jpg
artyfarty.jpg
rosewood being thicknessed.jpg
trial fit two laminates.jpg
laminates glued up and clamped.jpg
Richard

johnparchem
Blackwood
Posts: 545
Joined: Mon Jan 21, 2013 2:59 am
Location: Seattle
Contact:

Re: Falcate Classical #2 Build (in NZ)

Post by johnparchem » Sun Nov 01, 2020 11:59 pm

Nice, I love the rosette design. I have yet to make my own classical style rosette. Are you showing how it looks when all are stacked during installation or is that one, two or three tiles?

seeaxe
Blackwood
Posts: 768
Joined: Thu Dec 18, 2008 7:20 pm
Location: Auckland NZ

Re: Falcate Classical #2 Build (in NZ)

Post by seeaxe » Mon Nov 02, 2020 4:57 am

Hi John and thanks for your comments. The rosette block is one piece and I will cut slices off that and build up the rosette in the routed groove. I'll mitre the edges as I go and reverse each adjacent slice to get a nice pattern. I'll post pictures when I get there. It's a time consuming but relatively easy process and you end up with something very original which appeals.
Richard

seeaxe
Blackwood
Posts: 768
Joined: Thu Dec 18, 2008 7:20 pm
Location: Auckland NZ

Re: Falcate Classical #2 Build (in NZ)

Post by seeaxe » Fri Apr 09, 2021 8:03 pm

Time for a bit of an update on this one. There has been progress albeit glacial.

At the end of last year I glued the side laminates together and clamped them in the mould to set. That turned out pretty well and much better than my previous attempts, no significant gaps. I took a lot more time to get the bends just right….
happy with side lamination outcome.jpg
Having completed the side laminates I used them to form the linings. I like solid linings I think they look nice and tidy so I use them for the top and the back. These are made from bits of NG rosewood, heat bent and then glued and clamped into the sides, with a release layer of masking tape between them. Once formed I put them through the router to round off the bottom edge and generally tidied them up.
time to make  linings.jpg
I then glued them into the sides and put all the side splints in and of course the mass block anchors as well. All of the splints and anchors are macrocarpa to match the linings. The composite turned out pretty well and I was happy with all the glue joins.
laminations so far so good.jpg
At this point, I need to cut out the top of the body to accommodate the neck, so that when I glue the neck block in, I can clamp the bolted on neck to a perfect alignment. (There’s still some tolerance in the final assembly).
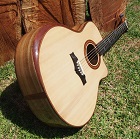
neck cut out.jpg
I built the joint up from macrocarpa and as you can see below it’s a bolted joint. In the last guitar the bolts were all accessed from inside the guitar. The two nearer the sound hole weren’t too bad but the two near the body were really difficult to get done up as, until I cut the sound port much later, I am working blind. I decided I could improve that this time and so the two bolts near the body go right through the block and are inserted and tightened from the outside of the body, a la telecaster bolt on style necks. Yes you are going to see two bolt heads but I think it will look OK and the ease of use is well worth it. Later in life the neck doesn’t get taken off much but when I am building it’s on and off a lot and I got fed up with spending 15 mins every time I wanted to do the inner bolts up.

Incidentally, feedback from the current user of the last one is hinting that the neck screws don’t stay tight. I guess that’s not too surprising, especially as the wood can expand and contract with humidity, etc and you cannot get the same clamping force you can with steel plies. Might need a bit of loctite on the thread. (works on my motorbikes!)

With the neck block glued in, I joined and thicknessed the back, braced it and put it onto the guitar (with neck clamped in perfect alignment). Then I glued two “cheeks” either side of the neck, to form a neck pocket in exactly the right place. These connect into the UTB, which forms the back of the pocket. This means that the UTB is actually fitted to the sides first, before the top goes on.
part assembly.jpg
By now it’s February and time to ride motorbikes so nothing much happened in the workshop. I did get to go to some amazing places though….
20210206_093927.jpg
Molesworth.jpg

Back to reality and it’s time to finish off the neck. I’ve had trouble in the past with the fretboard slipping under clamp pressure so decided I would go the “two panel pins through the fret slot” route. All good as the fret board staying in the right place. But, drama drama drama, when I went to pull the pins out, the glue had got at them and they wouldn’t budge. Being super careful I got one out OK but I managed to cut the other one off with the pincers instead. I tried pulling with pliers but only succeeded in making things worse.
oops.jpg
After a bit of thought and using some motorbike technology, I decided to apply some heat and got my soldering iron on the nail. It took a while but eventually I got the second nail out, but boy that was close. I had no idea how I would have dealt with it otherwise. It was about 15mm away from the edge so punching it through would have been risky to say the least. A bullet dodged.

With the fretboard on I’ve finished shaping the neck and headstock and have left a fair bit sanding to later. Still a couple of things to do.

So that’s me up to date. Next step is the top and that’s going to need some serious reviewing of Trevor’s books and what I did last time. The last top was too stiff (according to the bridge rotation test), but frequencies were not too far off, so my challenge is to reduce the stiffness but also the mass so that I can still achieve a good result. Then I’ll be into making the next batch of falcate braces.
Richard

johnparchem
Blackwood
Posts: 545
Joined: Mon Jan 21, 2013 2:59 am
Location: Seattle
Contact:

Re: Falcate Classical #2 Build (in NZ)

Post by johnparchem » Fri Apr 09, 2021 11:07 pm

It is fun to see the progress of your guitar. I am interested in the neck joint. I use Belleville washers to help keep the bolts tight. I like them more than a combination of a flat washer and a lock washer. A Belleville washer can stay tight through an expansion-contraction cycle. Other washers can indent on the expansion and end up looser on the contraction. The Loctite will not help. I have been thinking of using solid linings on my next project. I have made them before but glued the laminates while gluing the stack to the rims. I will try using tape for a release to allow me to shape the linings off of the rims.

Some years back my family spent about a month traveling through NZ, gorgeous country. One on the prettiest I have visited.

User avatar
TallDad71
Blackwood
Posts: 191
Joined: Thu Jan 19, 2017 6:20 am
Contact:

Re: Falcate Classical #2 Build (in NZ)

Post by TallDad71 » Sat Apr 10, 2021 3:42 am

Love your super thick linings John, that should give a real sturdy rim for the soundboard to vibrate off, how big are they? They look 10mm wide and 25mm deep.

Have you thought about using cocktail stick instead of panel pins to line up your fretboard? You won’t have to worry about removal afterwards just trim them down.
Alan
Peregrine Guitars

seeaxe
Blackwood
Posts: 768
Joined: Thu Dec 18, 2008 7:20 pm
Location: Auckland NZ

Re: Falcate Classical #2 Build (in NZ)

Post by seeaxe » Sat Apr 10, 2021 11:05 am

johnparchem wrote:
Fri Apr 09, 2021 11:07 pm
It is fun to see the progress of your guitar. I am interested in the neck joint. I use Belleville washers to help keep the bolts tight. I like them more than a combination of a flat washer and a lock washer. A Belleville washer can stay tight through an expansion-contraction cycle. Other washers can indent on the expansion and end up looser on the contraction. The Loctite will not help. I have been thinking of using solid linings on my next project. I have made them before but glued the laminates while gluing the stack to the rims. I will try using tape for a release to allow me to shape the linings off of the rims.

Some years back my family spent about a month traveling through NZ, gorgeous country. One on the prettiest I have visited.
Yes NZ is an amazing place to wander about in, we are very lucky. Takes me a day and a ferry ride to get to the places those photos were taken. We are also lucky to have great resources of good guitar building timber in our West Island.

Laminating solid linings in place would be a lot easier except for the fact that its then hard to get a neat finish on the underside of them. Even by using the side, in the mould, as the form there are still usually some small places where I have to clamp a lot when I finally glue them in. They look neat though, so worth the faffing around in my view.

I looked up Belleville washers, thanks. I've previously used normal spring washers and nylock nuts. Ill give them a try and see if they are better. I have glued steel washers in place in the neck block for the heads of my exterior screws to bear on, but not sure I can get a spring one on there.
Richard

seeaxe
Blackwood
Posts: 768
Joined: Thu Dec 18, 2008 7:20 pm
Location: Auckland NZ

Re: Falcate Classical #2 Build (in NZ)

Post by seeaxe » Sat Apr 10, 2021 11:11 am

TallDad71 wrote:
Sat Apr 10, 2021 3:42 am
Love your super thick linings John, that should give a real sturdy rim for the soundboard to vibrate off, how big are they? They look 10mm wide and 25mm deep.

Have you thought about using cocktail stick instead of panel pins to line up your fretboard? You won’t have to worry about removal afterwards just trim them down.
Thanks they are about 10 by 20, which is plenty to deal with the binding and purfling I use.

I had forgotten about cocktail sticks....a better idea. Another is the plastic you use for side dots on the neck. That's the trouble with building so few guitars, I forget all this stuff and am just not methodical enough in capturing it. I do have a build schedule document that I am supposed to update every time I build but I have to admit I'm pretty poor at a) adding notes and b) remembering to look at it before I get going. Always room for improvement!!! (lots of room in my case) but I'm doing this for fun so I'm not going to beat myself up over it. :)
Richard

User avatar
TallDad71
Blackwood
Posts: 191
Joined: Thu Jan 19, 2017 6:20 am
Contact:

Re: Falcate Classical #2 Build (in NZ)

Post by TallDad71 » Sat Apr 10, 2021 7:37 pm

My linings have been around 5mm thick. If I were to make mine 10mm thick then I would effectively lose 65 square centimetres of vibrating plate all the way around the guitar.

I wonder whether this ‘loss’ would be balanced out by the ‘gain’ of the soundboard sitting on a much more rigid set of linings, therefore losing less energy into the sides of the guitar. I read somewhere, that the top is similar to a trampoline, if the frame is weak the energy will dissipate away.
Alan
Peregrine Guitars

seeaxe
Blackwood
Posts: 768
Joined: Thu Dec 18, 2008 7:20 pm
Location: Auckland NZ

Re: Falcate Classical #2 Build (in NZ)

Post by seeaxe » Sat Apr 10, 2021 8:59 pm

Well, I can think of one way to find out....

The sides are infinitely stiffer than the top as they are both laminated twice the thickness and heavily curved. So that top lining is your method of "clamping" the edges to the very stiff sides, thereby "fixing" the edge of the vibrating plate. This will make plate stiffer, all other things being equal, compared to not so fixed edges. But whether that's what you want is another matter.

I've done it mostly because I use wide purfling and I don't want to risk routing off the top when I cut the channel.

It might not actually be 10 wide...ill measure it tomorrow.

Have re read the relevant bits of the design book tonight and I think I know how I'm going to approach building the top. More on that later.

Onwards and upwards
Richard

seeaxe
Blackwood
Posts: 768
Joined: Thu Dec 18, 2008 7:20 pm
Location: Auckland NZ

Re: Falcate Classical #2 Build (in NZ)

Post by seeaxe » Mon Apr 12, 2021 9:35 am

A few more pictures to round out the last post

Assembled, progress to date. Tuners trial fitted, neck on
20210412_111717.jpg
Headstock mostly finished, needs a bit of filling and sanding
20210412_111722.jpg
The neck joint, with the "cheeks" in place. These were glued on against a taped up neck so that the "pocket" is a perfect fit and alignment.
20210412_111750.jpg
View of the UTB and truss rod. Finger board extends over the sound hole (its just occurred to me that will change the T1,1)
20210412_111806.jpg
View of the assembly from the back. The screws will eventually be black, I think but not too intrusive as they are. There are steel washers under the heads, glued into the neck block before it was assembled.
20210412_111837.jpg
Close up of the screws. Considered a metal plate a la fender but decided less is more. We will see how this works.
20210412_111841.jpg
Richard

User avatar
WJ Guitars
Blackwood
Posts: 372
Joined: Thu Jan 26, 2017 4:28 pm
Location: Sutherland NSW
Contact:

Re: Falcate Classical #2 Build (in NZ)

Post by WJ Guitars » Mon Apr 12, 2021 1:05 pm

The guitar build is looking great. The neck design with no heal will be an asset for playing at the body joint.

Wayne

User avatar
kiwigeo
Admin
Posts: 10580
Joined: Sat Sep 29, 2007 5:57 pm
Location: Adelaide, Sth Australia

Re: Falcate Classical #2 Build (in NZ)

Post by kiwigeo » Mon Apr 12, 2021 2:51 pm

Interesting neck joint Richard. How do you plan to deal with the side end join where the heel block would normally be?
Martin

seeaxe
Blackwood
Posts: 768
Joined: Thu Dec 18, 2008 7:20 pm
Location: Auckland NZ

Re: Falcate Classical #2 Build (in NZ)

Post by seeaxe » Mon Apr 12, 2021 4:25 pm

Like this
12 done 4.jpg
Except this time I hope to actually get it right.
Richard

seeaxe
Blackwood
Posts: 768
Joined: Thu Dec 18, 2008 7:20 pm
Location: Auckland NZ

Re: Falcate Classical #2 Build (in NZ)

Post by seeaxe » Mon Apr 12, 2021 4:27 pm

WJ Guitars wrote:
Mon Apr 12, 2021 1:05 pm
The guitar build is looking great. The neck design with no heal will be an asset for playing at the body joint.

Wayne
Feedback to date has been good. Helps with notes up the neck.
Richard

seeaxe
Blackwood
Posts: 768
Joined: Thu Dec 18, 2008 7:20 pm
Location: Auckland NZ

Re: Falcate Classical #2 Build (in NZ)

Post by seeaxe » Mon Apr 12, 2021 5:52 pm

Apologies for the length of this next post but I'm hoping by thinking out loud, I might get some valuable input from others who have gone before me. I've got a limited supply of good tops so most of this is about trying not to waste making silly or avoidable mistakes. If you're not interested in falcate classicals and are just here for the pictures you will want to go and switch on the telly, nothing to see here.

Reflections on the use of EI in brace/soundboard thickness design

(refer section 4.4.5 of Vol 1)

When I built my first falcate [no.12] I was keen to calculate the EI of the soundboard and compare that with Trevor’s figures for other “good” classical guitars. A target EI of 15 to 20 Nm^2 is given in the books for classicals.

I tore into the spreadsheet and in no time at all had it set up and calculating. When I plugged in my planned sizes, I got a huge EI, around 80 Nm^2, which would be overbuilt even for a responsive steel string. I concluded I must have something wrong in the spreadsheet.

At the same time, I was asking others what they do and the general response was that they leave the primary falcate braces at 10mm or thereabouts, on their classicals. A response at that time in another thread from Jurgen V in (Switzerland or Germany, I think) noted he had followed the spreadsheet and calculated smaller braces and the end result was not good, he had to re-top it. I was also asking questions about the bridge rotation test and what results people were getting for their classical builds . My recollection is that many were either not getting the 2 degrees rotation, or were not actually testing this but relying on the tap tests to see what frequencies they got. Most were getting what they wanted 180 to 200 hz for T1,2 and so were leaving it at that.

So I decided to leave the spreadsheet and press on conscious of the fact that I was probably building too stiff but that removing stiffness is doable but adding it is next to impossible. (I had forgotten about the mass part of the problem, more on that later)

The end result is that that with a finished soundboard weighing 190 grams and having an EI on the order of 80Nm^2, I got a T1,2 of 189Hz. I was happy with that, didn’t thin out the top and finished the guitar.

The falcate guitar [no.12] sounds OK, but nothing really stands out about it. My earlier Torres style braced guitar [no.8] sounds about the same to my naked ear. That guitar is now 10 years old however so probably not going to sound any better. The falcate was brand new but sounded just as good. I was happy enough.

Fast forward to today, or last night to be precise.

I went back to the spreadsheet looking for the almost inevitable mistake and yes there is one but it didn’t affect the result. So I decided to see what the previous Torres braced guitar [no.8] would have been. I used the Cumpiano and Natelson dimensions for the fans, they start life as 6 high by 5 wide rectangles but get carved and sanded down to about 5 high triangles. From memory I left the top about 2.3mm thick on that one. Lo and behold, EI was 15 Nm^2. I have yet to do a bridge rotation test on that guitar but a string change is due so will do it then. It’s a light guitar and you can see the bracing imprinted through the top, so it doesn’t seem to me to be overbuilt. I’m happy with the sound and it’s still the benchmark I want to improve on.

Now I was more confident I had the spreadsheet right, I was interested to explore what difference the CF tow makes.

Trevor says that the main reason for the CF is to prevent creep in the timber, rather than to provide strength. I wouldn’t dream of arguing with Trevor but, as one of the advantages of this kind of calculation is that you can account for different materials by just treating them as the same material but multiplying their width (parallel to the neutral axis) by the ratio of the Young's Mod for each material, I decide to have a go.

The CF I am using has an E of 230,000 MPa, whereas the spruce top has an E of 11,900 MPa. That’s a ratio of about 20, so any piece of CF I add into the calc needs to have its width increased by a factor of 20. Using a vernier gauge I measured the CF tow thickness as 0.1mm and estimated it was about 1mm wide when in place. I added this into the spreadsheet.

My conclusion after looking at it is that
a) the CF is not insignificant
b) as you approach the lower, more desirable values of EI, the CF becomes more and more significant, which is what you might expect.
c) the strand of CF under the brace is not doing much for the system, as it is very close to the neutral axis. Those strands represent about 0.2% of the total EI and I wonder whether they are worth putting in, as the braces would be simpler to glue down without them there.

For my original dimensions of 10mm high primary braces and 7mm high secondaries, it represents just over 10% of the total EI. If I were to reduce the braces to 8mm height and 4mm width the CF percentage will increase to 14%. If I were to build a Torres fan system (EI = 15, as above) and put CF on the fans then EI will change to 18Nm^2, a 20% change in stiffness with little additional weight. Worth thinking about if i go back to Torres bracing as it's a lot easier than building the falcate bracing.

A question though re this particular calc. At 50mm north of the bridge, the falcate braces are not perpendicular to the cross section line, in the case of the secondaries they are more like 45 degrees to it. What allowance are people making for this? If any? Are they considered not substantially longitudinal in the calc??? Technically the width of the brace is 1.414 more than if it were perpendicular.

OK so taking all this into account, how thin do I go with the top and how high do I make my falcate braces to get my EI down to say, 20??

The answer seems to be make the top 2.1mm thick, the primary braces 7 by 4mm and the secondaries 4 by 4mm, or something like that. Interestingly, I got about 0.5 degrees of rotation in my bridge test, so making it 4 times floppier might well achieve the desired 2 degrees.

But of course that’s only part of the answer because as Trevor helpfully pointed out,

"Resonant frequencies are proportional to SQRT(stiffness/mass); so....... "

If I reduce the stiffness but don’t reduce the mass of the soundboard then I will not be able to achieve the same resonant frequencies

If I don’t want the resonant frequencies to change then the relative proportions of stiffness and mass have to stay the same. That means if I want to drop my soundboard stiffness by a factor of 4 (80 to 20) then I have to do the same with the weight of top. That means my soundboard, completed with bridge would theoretically need to weigh around 50 grams. The bridge weighs 15 grams, which leaves 35 grams for the top and the bracing. Clearly that’s not going to happen as the top on its own will weigh much more than that.

More thinking required. Probably time to starting thinking about specific mobility and the effective mass of the top, which wont be the same as its actual separate mass.
Richard

seeaxe
Blackwood
Posts: 768
Joined: Thu Dec 18, 2008 7:20 pm
Location: Auckland NZ

Re: Falcate Classical #2 Build (in NZ)

Post by seeaxe » Tue Apr 13, 2021 8:33 pm

Tonight's efforts went into some bridge rotation checks and a first attempt to measure stiffness of my No.8 guitar. Ill get to No.12 tomorrow night hopefully.


No.2 bridge rotation check. Unsurprisingly it only rotated 0.5 degrees. This was the first real guitar I built, from a kit so I had no idea really what I was doing and just glued it all together. It sounded fine at the time but in comparison to No.8 its very tinny. Currently languishing in the back corner of one of the bedrooms... :(
20210413_193753.jpg


No.8 bridge rotation test, this one rotates 1.15 degrees. Better but not at the desired 2 degrees. I didn't really know what I was doing on this one either tbh, I just followed the Cumpiano and Natelson bracing plan. It goes to show that with good materials and following a decent plan, you should end up producing a fairly decent guitar.
20210413_195746.jpg
This is my set up for the load test. I have a 0.01mm dial gauge fixed to a scrap wood bridge, which is screwed down to the bench. First attempts at loading it were a bit messy, as I was trying to use boxes of screws, which obscured the dial gauge (duh) and were not really loading the bridge, where I was measuring deflection. I need a better way of loading it. More thinking required.
20210413_204328.jpg
From this, for No.8 I estimated a stiffness of 25,000N/m, from 0 to 500g. I actually loaded it to 1500g and the plot is not linear, the top gets much stiffer after 500g. I got some differences between loading and unloading cycles so I plotted all the readings and then eyeballed the stiffness from that. I plan to test No.12 tomorrow night. I think Ill focus on the 0 to 500g part.

Haven't got my mike setup sorted yet, have borrowed my sons fancypants Behringer condenser mikes but forgot to borrow the leads to plug them in. I also need to sort out a way to block off the sound hole. Havent got any foam lying around atm.
Richard

Dave M
Blackwood
Posts: 594
Joined: Tue Jul 15, 2014 6:44 am
Location: Somerset UK

Re: Falcate Classical #2 Build (in NZ)

Post by Dave M » Wed Apr 14, 2021 2:43 am

Richard fascinating stuff please keep it coming. Having pretty much failed with falcates on classicals I have reverted to Torres style fan. You clearly have more stamina than me!

A small point: I have been using a 600 mm lightweight pointer for the bridge rotation measure - easier to measure the larger deflections. Alan Caruth has even talked about using an infra red pointer. Even better.

There was a lot of discussion of the mobility testing in I think the books sub forum a while back. Someone came up with the idea of loading the mass actually through the dial gauge. Worth digging through.

Cheers Dave
------------------
Dave

seeaxe
Blackwood
Posts: 768
Joined: Thu Dec 18, 2008 7:20 pm
Location: Auckland NZ

Re: Falcate Classical #2 Build (in NZ)

Post by seeaxe » Wed Apr 14, 2021 5:01 am

Thanks Dave, now you come to mention it i do recall it. Ill go and have a look.

Whether i carry on with falcate braces or not the process in the books and the ability to assess what you are doing as you go is the game changer.
I definitely dont understand it all but i understand a lot more thsn i did when i built those first two.

The first falcate was a bit of a fail so its worth another try. Im also going to build a parlor at some stage and will use it for that.

Cheers
Richard


seeaxe
Blackwood
Posts: 768
Joined: Thu Dec 18, 2008 7:20 pm
Location: Auckland NZ

Re: Falcate Classical #2 Build (in NZ)

Post by seeaxe » Fri Apr 16, 2021 4:56 pm

And thanks again. Some work to do on my deflection jig....
Richard

seeaxe
Blackwood
Posts: 768
Joined: Thu Dec 18, 2008 7:20 pm
Location: Auckland NZ

Re: Falcate Classical #2 Build (in NZ)

Post by seeaxe » Thu Aug 19, 2021 5:36 pm

Woohoo...lockdown !!!! Means only one thing...shop time :) :)

After revisiting the tap testing on my remaining spruce tops, I went with this set of Englemann spruce. They all came out much the same thickness, 2.00 to 2.15mm thick. Whether I actually go that thin, well maybe. After playing my falcate guitar my music teacher (who this is for) said he would prefer conventional bracing so thats what is going to happen. Ill do another falcate next time and give it another go.

Onwards...shooting the top panels
Englemann spruce top on shooting board.jpg
Glued together
Glueing the plates together.jpg
Time to start on the rosette
Rosette block.jpg
Cut into slices
Slices.jpg
Have I got enough? yep, as long as I don't stuff it up again
have I got enough yes.jpg
One of my favourite things about this bit is the shavings you get....I like looking at them but they go in the bin lol.
shavings.jpg
Richard

Post Reply

Who is online

Users browsing this forum: No registered users and 63 guests