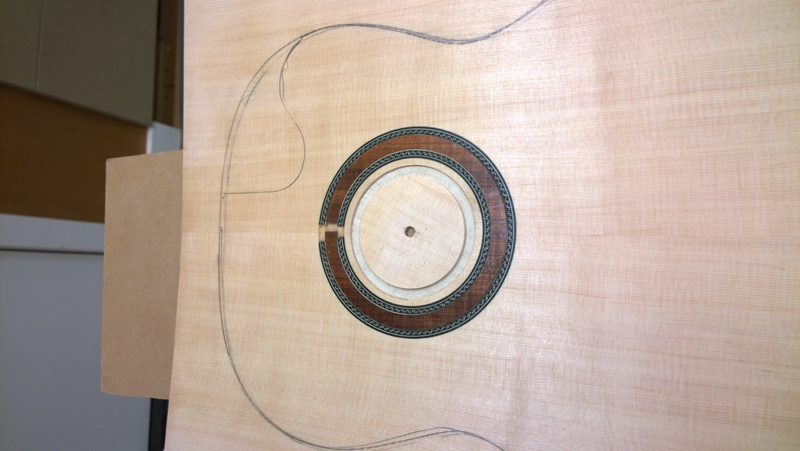
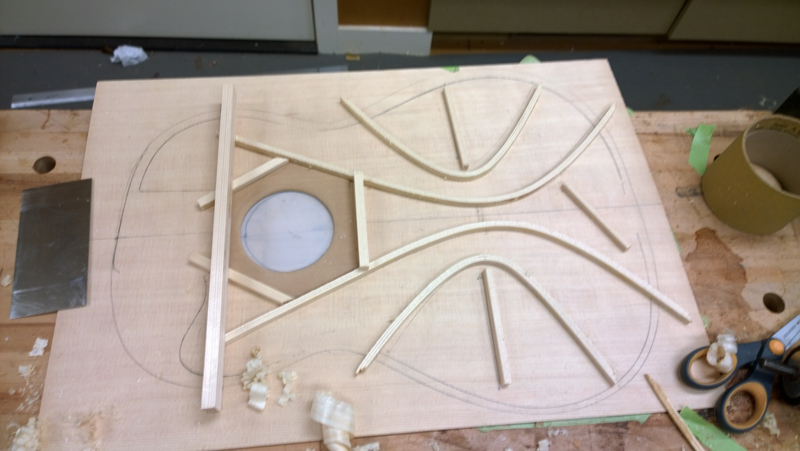
Falcate Braces Classical Top Radius dish.

You can ask questions here about Trevor and Gerard's exciting new book on Luthiery.

Moderators: kiwigeo, Jeremy D

Post Reply
johnparchem
Blackwood
Posts: 546
Joined: Mon Jan 21, 2013 2:59 am
Location: Seattle
Contact:

Falcate Braces Classical Top Radius dish.

Post by johnparchem » Fri Feb 13, 2015 4:22 pm

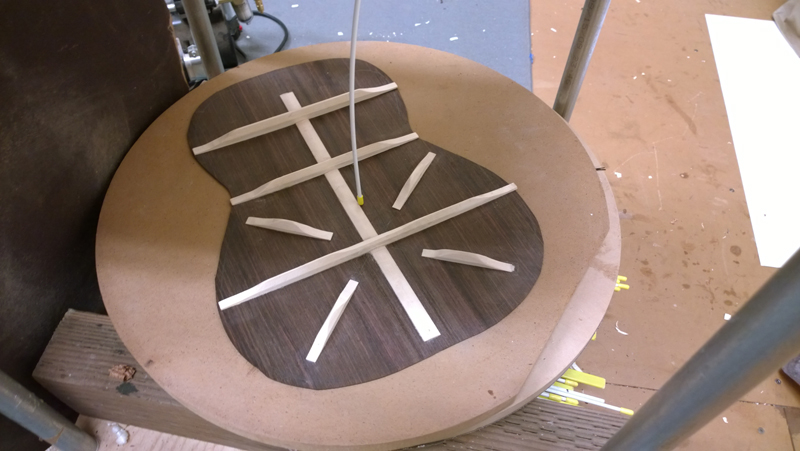
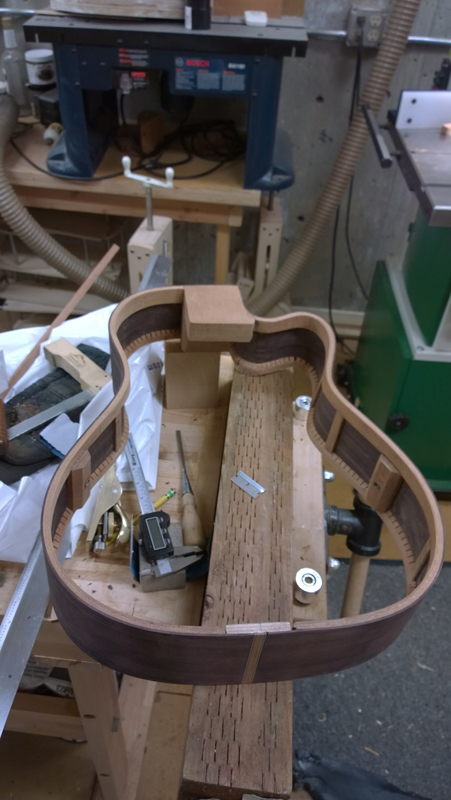
I am very close to finishing the top, back and rims for my falcate classical guitar. My current plan is to press non radiused falcate braces in either a 8m or 10m dish, Glue the transverse brace down flat. Also the top rims are profiled dead flat. My past three classical guitars have been built Spanish style with a flat solera with a dished lower bout. So I have always profiled the top rims flat. I am going to have a bolt on bolt off neck and use a wedge under the fret board to set the angle. At this point I intend to leave the top rims without a radius, but I still am at a point where I can still profile them and am open to suggestions.

Here is whate I have so far.

Image

Image

Image

Image

johnparchem
Blackwood
Posts: 546
Joined: Mon Jan 21, 2013 2:59 am
Location: Seattle
Contact:

Re: Falcate Braces Classical Top Radius dish.

Post by johnparchem » Sat Feb 14, 2015 1:47 am

I know I am deviating from the The Book which if I read correctly even for a classical a radius dish is used on the top and then the upper bout is flattened. I guess it is not completely adding up for me, to the point that I trust my understanding. On a classical I ultimately want the top of the fret board to have a forward angle relative to the top. If I radius the top even after flattening the upper bout as suggested in The Book I will have an angle toward the back of the guitar like a steel string. In the build book the forward angle is achieved using a 4mm or so wedge between the fret board and the neck.The 4 mm is on the nut side. My experience would have had me using a 2 mm wedge so I could suppose that the additional couple millimeters were used to account for a backwards angle of the neck relative to the top. Going off on my own I thought to leave out the radius on the top rims have the neck and the top at 90 degrees to the rim and to use the appropriate size wedge between the neck and the fret board to achieve the desired string height at the saddle. I do understand that I would be working against the curve that the braces would be putting in the top but thought it was still doable.

I am still at the point where I could put a radius of 30' on the top rims. I will glue the braces to the top as suggested in the book, flat transverse and the rest of the braces glued in the 30' radius dish. At that point I could see how that braced top would fit on the flat rims I have and decide then.

User avatar
Trevor Gore
Blackwood
Posts: 1606
Joined: Mon Jun 20, 2011 8:11 pm

Re: Falcate Braces Classical Top Radius dish.

Post by Trevor Gore » Sat Feb 14, 2015 12:50 pm

There are many workable solutions around this, provided you understand how the top/neck geometry is going to work out.

In the "flat top rim" construction methods, the "flat" is your reference surface and measurements are generally taken in relation to that. Building in a solera, you can maintain a flat rim and dish out the middle, and (when the sound board is turned top uppermost) the dishing appears like a pitcher's mound relative to the flat outfield. All calculations are done relative to the flat outfield and the pitcher's mound is a 2 or 3mm hump that means you need less neck forward set to get to the 3&4mm action at 10-11mm string height above the soundboard. The "flat rim" method always produces a concavity around the sound hole. Put a straight edge from the top of the pitcher's mound to the top of the upper bout, there will always be a gap beneath it. Some people don't like this hollow look, some people don't have a problem with it, most people don't even notice it.

Building using radius dishes, you have to use a different reference, as there is no flat outfield to refer to. So projections of tangents are used, usually the projection of a tangent to the upper bout over the saddle position. The smaller the radius on the dish, the greater the gap between the projection of the tangent to the upper bout (PTUB) and the sound board at the saddle position. Obviously, this needs to be minimised for the preferred neck geometry (3&4mm action 10-11mm clearance) to work out reasonably. This is achieved by flattening the upper bout (max radius) but this still leaves a gap between the PTUB and the saddle position. Forward tilt (supplied by the wedge in the bolt-on, bolt-off (BOBO) design) gets things back to where they need to be.

If you build the sound board in a radius dish then glue it to flat rims, you have to be sure to reconcile your measurements from different references. For example, is 3mm of rise created in a radius dish (rather than a solera) still going to be 3mm of rise when you've glued the periphery to flat sides? Answer - no. What is it going to be? Answer - hard to predict. So therefore hard to figure out how much wedge is required. If you flatten the upper bout of the soundboard and glue to flat rims, it's likely that you'll get the hollow I mentioned earlier. If you flatten the upper bout of the sound board and the upper bout rims whilst keeping the rest of the sound board and rims dished, you don't get the hollow and you do get the geometry working out as prescribed in the book.

If you have a dished soundboard and glue it to flat rims, there's also a propensity, down the track, for cracks along the grain to appear in the waist region.

To machine the pocket for the loose tenon in the BOBO design, the top surface of the neck and the upper bout need to be co-planar. Also, the order of the processes is to dome the rims then flatten the upper bout. Going from flat rims and just doming the lower bout can also be done, but it is also easy to sand in a crank angle at the waist if you do it that way around, which will upset your geometry.

I think that covers all the possible options you've mentioned. They can all be made to work so long as you keep track of the geometry.
johnparchem
Blackwood
Posts: 546
Joined: Mon Jan 21, 2013 2:59 am
Location: Seattle
Contact:

Re: Falcate Braces Classical Top Radius dish.

Post by johnparchem » Sun Feb 15, 2015 1:01 am

Trevor, Thank you for your detailed response. I have left enough height in the rims so the I can put a radius on the top, followed by re flatting the upper bout. I took a straight edge on one of my classical guitars and looked the best I could with the bridge on and I can see what you are describing, especially relative to the SS I built following The Book. While I never noticed it as a concavity (it is) I could always see the difference between the profile of my classical guitars vs a SS. I just accepted it.

I was hesitant to radius the top rim, mentally I had trouble going backwards from my desired geometry by radiusing the rims when I wanted the upper bout flat and angling the neck back when ultimately I want the top of the fret board with a forward pitch relative to the top.
I had thought through the geometry of having the flat rims, flat transverse brace, with the rest the falcate and the tertiary braces glued in the dish. While I was unsure of the height of the curve at the saddle, I reasoned that I could determine the slope of the wedge at a time in the process where I could physically measure what was required.

Your describing a propensity for cracks down the line in the waist region does address the main concern I had with my plan of action. My previous classical guitars have a second stout transverse brace right there, where as the falcate brace top only has the upper transverse brace. I had been trying to mentally work through the stresses caused by flattening a top built partially in a radius dish onto flat rims.

I will sand a 32' radius into the top rims, followed by flattening the upper rims.

Post Reply

Who is online

Users browsing this forum: No registered users and 17 guests