One way to install the center graft on the back

Got a new way of doing something? Or maybe an old method that needs some clarification.

Moderators: kiwigeo, Jeremy D

Post Reply
User avatar
Rod True
Siberian Tiger
Posts: 234
Joined: Thu Sep 27, 2007 10:18 am
Location: Abbotsford, BC Canada

One way to install the center graft on the back

Post by Rod True » Mon Apr 06, 2009 3:29 pm

I use to install my center grafts on the back prior to installing the braces, but I never was able to get the braces installed without even a slight gap between the brace and the graft. So I changed my method. I know Lance Kragenbrink does (or did, maybe still does) it this way and that's where I got the idea.

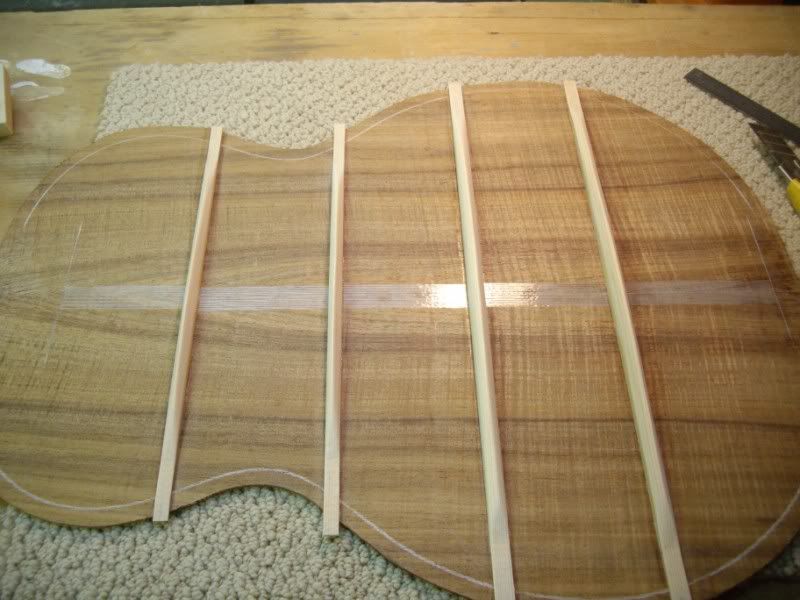
I now install my center graft after the braces are installed.

Here's how I do it to ensure a nice snug fit.

I first measure the distance from the outside edge of the body to the inside edge of the head and tail blocks. I than mark that distance on the inside of the plate.

Tail

Image

Head

Image

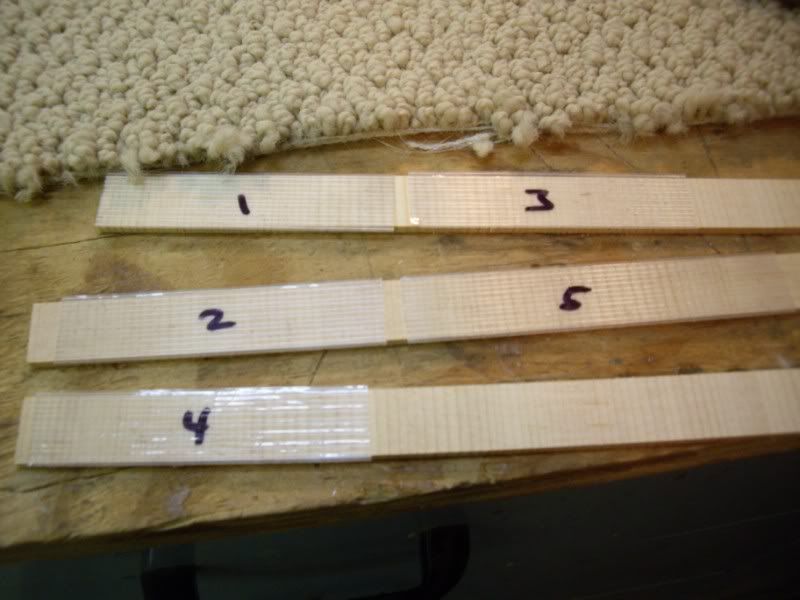
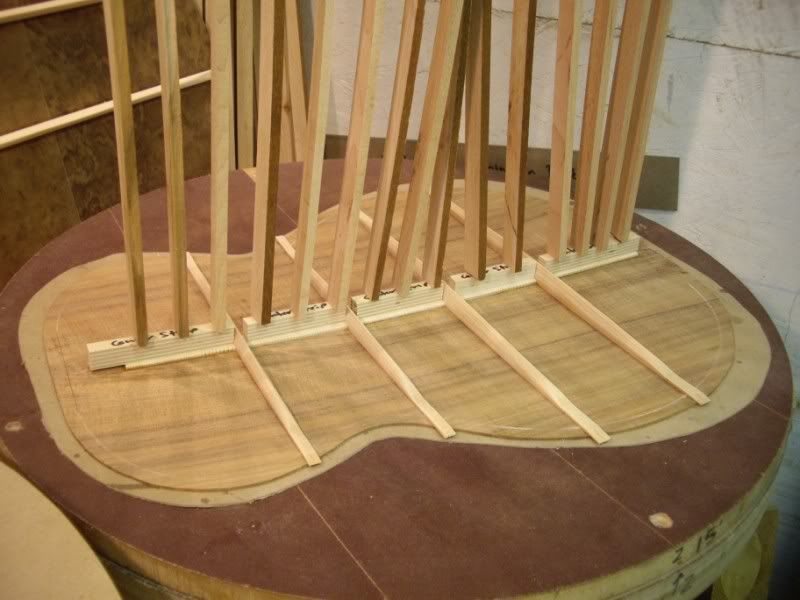
I than use tape to find my precise length of the graft, between each brace. I use the 3M strapping tape as it doesn't stretch at all. So I put tape in between each brace and use a razor blade to cut it to the exact distance between the braces. I than mark each piece of tape so I know which piece goes where.

Image

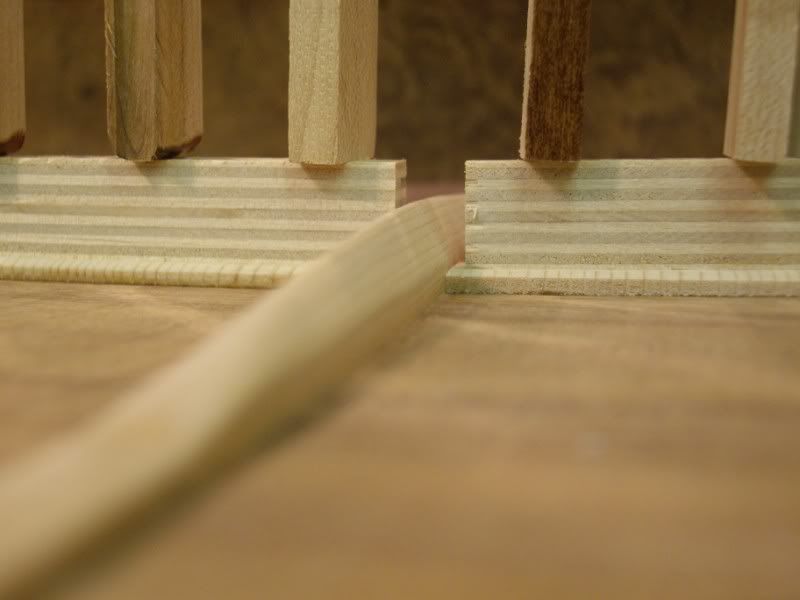
I than pull the tape off and put it on the center graft. I align one edge of the tape to the edge of the graft (not shown in the picture though as I thought of this after I took the pic) and than I cut right at the end of the tape. This give me a perfect fitting center graft, and actually when gluing them up in the go bar deck, the radius of the back helps push the ends of the graft against the brace.

Image

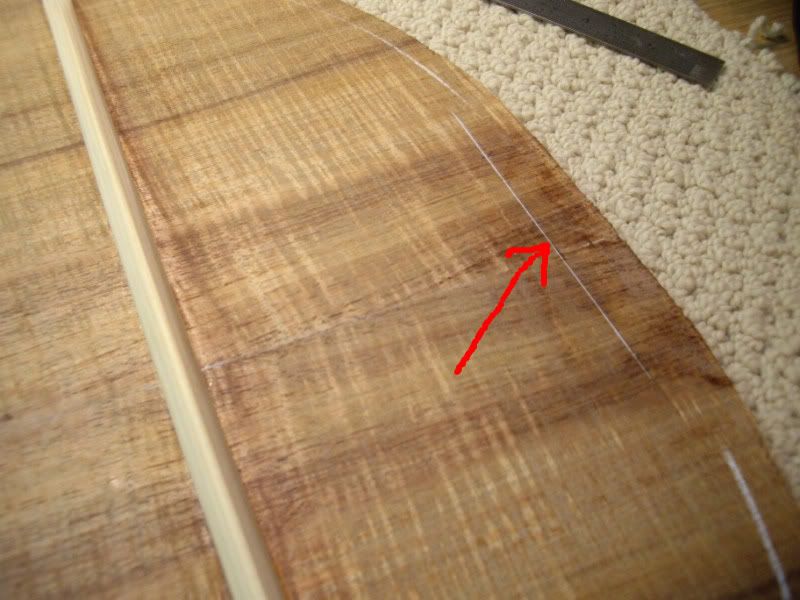
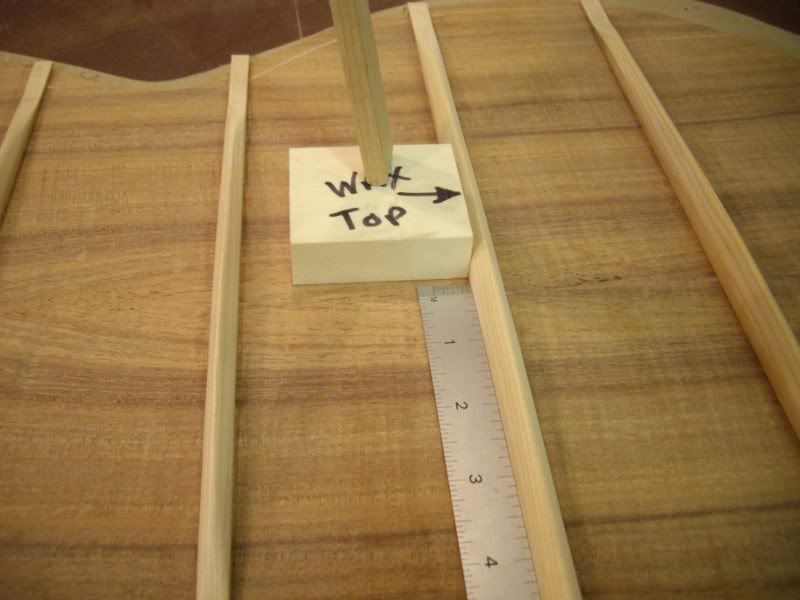
I make my center grafts 5/8" wide (just because) and here's how I layout each graft location so I get them lined up.

I have a block that is squared up and I put wax on the base and along two edges. I measure from the center of the plate (easy to see with a book match like that Tassie Blackwood) 5/16" (half my center graft width) and I locate my aligning block. I put a go bar on it to hold it in place.

Image

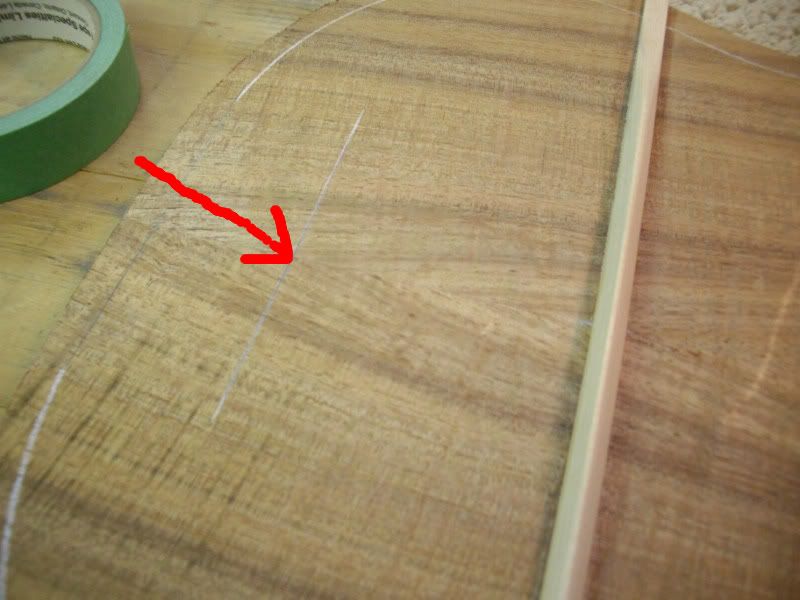
Than I just but up the center graft to the block and the brace and I'm good to do. I have little clamping cauls specific for gluing the graft down.

Image

And a close up of the nice tight fit.

Image

Hope this helps someone.
"I wish one of the voices in your head would tell you to shut the hell up." - Warren De Montegue

User avatar
Allen
Blackwood
Posts: 5252
Joined: Thu Oct 11, 2007 5:39 pm
Location: Cairns, Australia
Contact:

Post by Allen » Mon Apr 06, 2009 4:56 pm

Helps me. Thanks Rod. I'm going to give that a go the next time around.
Allen R. McFarlen
https://www.brguitars.com
Facebook
Cairns, Australia

User avatar
Nick
Blackwood
Posts: 3641
Joined: Thu Feb 26, 2009 11:20 am
Location: Christchurch, New Zealand
Contact:

Post by Nick » Mon Apr 06, 2009 6:01 pm

It's always the simple idea's that I tend to overlook. It needs somebody like you Rod to come along & slap me in the head with them occasionally! Doh!!! Thanks for that excellent tutorial & the slap in the head :wink:
"Jesus Loves You."
Nice to hear in church but not in a Mexican prison.

User avatar
Lillian
Blackwood
Posts: 1705
Joined: Fri Sep 28, 2007 10:31 pm
Location: New Mexico, USA
Contact:

Post by Lillian » Mon Apr 06, 2009 9:02 pm

Dang Rod, you're on a roll. I'm printing this one out and adding to the "how To's" on the bench. What a simple answer to a very frustrating chore. Thank you.

Post Reply

Who is online

Users browsing this forum: No registered users and 12 guests