Hi Everyone.
Well, back by popular demand (

) and by chance that I happened across the original images, is this little tutorial on photos and editing. To those who don't know, I had done this some time ago - but it was lost to the aether in the meltdown. Haven't had the time to
re-write the lot and collate the images again, until now.
This tutorial came from requests on how I go about the images on my website and in the gallery here on the forum. It is pretty straight forward to follow and aimed at those without expensive equipment or access to light boxes, professional flashes, studios etc. This is also just the basics - I am not going into adjusting white balance on your camera, apertures, shutter speeds, film sensitivity etc.

You can and likely will, take better images with an expensive Digital SLR for example, but you can achieve good results with even the most basic of digital cameras. This tute and the pictures that the request of same were drawn from were taken on a $100 'point and click' digital camera. I should point out here that I am no expert - this simply represents my techniques to achieve decent results. I don't think they are perfect, but like guitar building, they get better as I go.
Lets begin.
My first pointer is that light is everything. In photography or any piece of art for that matter, light and shadow make all the difference. Contrast highlights shape and creates depth. For a good photo without equipment, you want good natural, indirect or diffused lighting. Indoors near a window that does not quite have direct sun can be good. You want light to 'surround' your piece to even out too stark contrast a bit. You don't want one end of the instrument bright and the other in shadow - unless it is a deliberate artistic vision. Therefore you will want to reflect as much light as possible. In this situation, I use a table placed near said window with a white sheet draped over it and up the surrounding wall to give me an all white 'cove' so to speak. Something like this -
- setup.jpg (119.09 KiB) Viewed 9440 times
When using material such as a sheet as opposed to white cardboard say, you need to be very careful about wrinkles covering any part of the instrument. I'm not concerned with the wrinkles in the background themselves so much, as I remove that later. You can also use the opposite and try to absorb as much of the light as possible using a black background - wetsuit material in a roll is great for this purpose. I prefer the white for the most part though. Alternatively, camera/photographic supply stores sell a flexible white plastic of some sort specifically made for the job... This is the budget version tutorial though...

When positioning your instrument, take mind as to the type of reflections you are getting. The white backing is great to throw light around and remove unwanted reflections but as you are using natural lighting, that has to get in somewhere so you will have reflections depending on the angle you are shooting from. Such as this window frame -
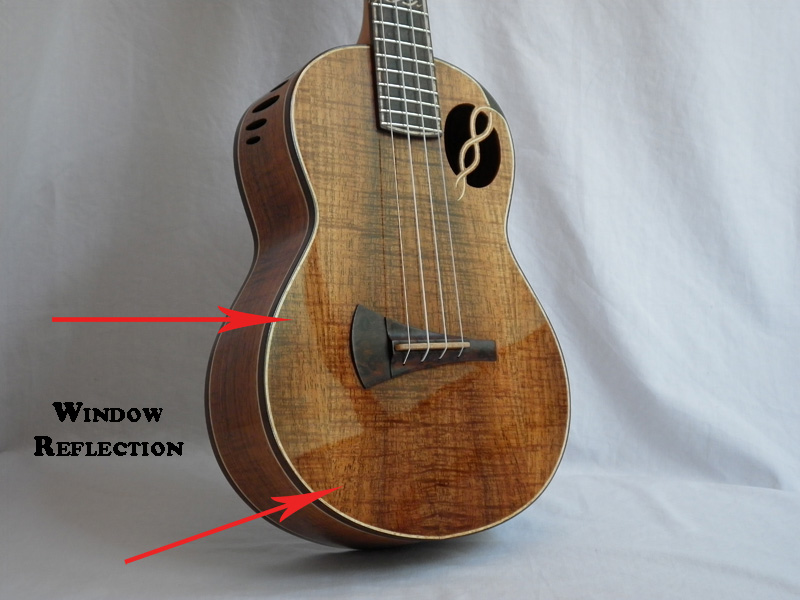
- reflection_1.jpg (121.53 KiB) Viewed 9440 times
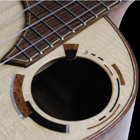
As many of our finishes are high gloss, it can make it difficult to shoot. They will reflect everything, yet without reflection, they can make the finish look flat. It is difficult to get the balance right, particularly when you are also wanting to highlight the refraction of light in the figure. You can use the highlights and reflections deliberately as in this picture to show finish gloss, but I feel it is too much here.

- reflection_2.jpg (108.44 KiB) Viewed 9440 times
Just a nice highlight on an edge/corner or similar is good in my opinion. It pays to mention now that a tripod is seriously a worthwhile investment. Outdoors you usually or at least often, have enough light for sufficient shutter speed to make hand-held shooting viable. Indoors however, you rarely have enough light. The slower shutter speed therefore means blurry images if taken by hand. Don't fool yourself, even pressing the button is enough movement to blur an image. You can pick up a tripod for under $30 these days, less on ebay or similar. They might not be the best, but are sufficient for this purpose.
If you really can't justify the purchase, at the very least lean on something. Hold the camera on top of a bench or table as still as possible and if you take enough photos, you should luck out and find a few are ok.
On that note, take many photos - this is the nice advantage of our digital age. I can't begin to imagine having to do all this on film and not knowing the results until the processing is done! You will find that the light varies image to image as the sun passes behind clouds or the auto adjustment on the camera picks up something different. Trying to see everything through the viewfinder or screen is unlikely too. Get down at camera level and peer at what you are shooting, but you will still find you didn't notice that reflection or the machine head behind a wrinkle etc so the more images to pick from the better.
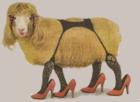
Finally a note on composition. I move the instrument around a lot and try different angles. I find that a bit of 'attitude' in the shot can make the item seem larger than life so to speak, so play around. This next image is a good example of what I mean. But here ends the 'photo shooting' aspect of this tutorial. Next I'm going to use Photoshop to remove the background altogether. I am fortunate enough to own my own copy of this - for those who don't and can't justify the purchase, I believe there is free software available with similar functions though I can't recall now what it is. Perhaps someone else will chime in with the option. If not, you could certainly opt to use a 'harder' flat backing such as a large roll of cardboard or similar so your background is acceptable as is. The sheets could be acceptable too, just that they don't go with my website you know?
As I said, pretty straight forward thus far but I hope it helps some of you. Sorry to those who were hoping of a more accessible way to remove the background or create similar images to mine...
Anyway,
that is how I achieve the photos themselves.
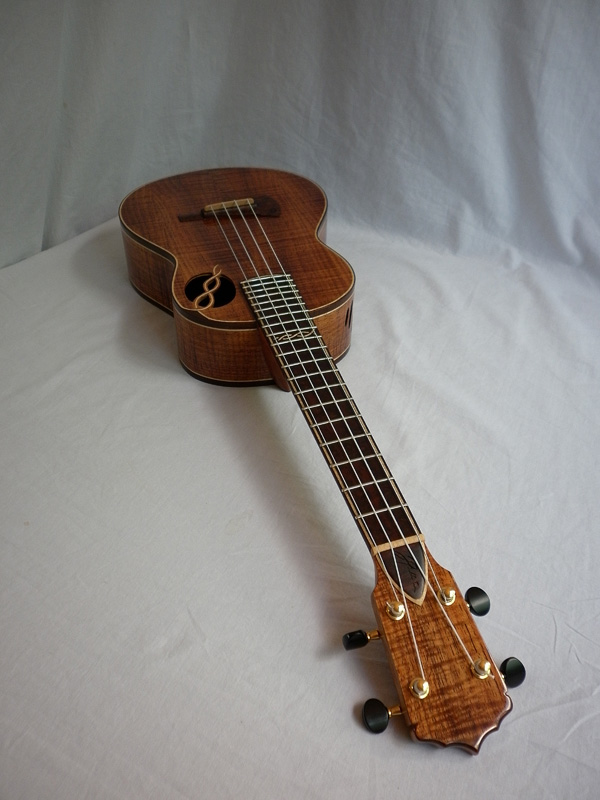
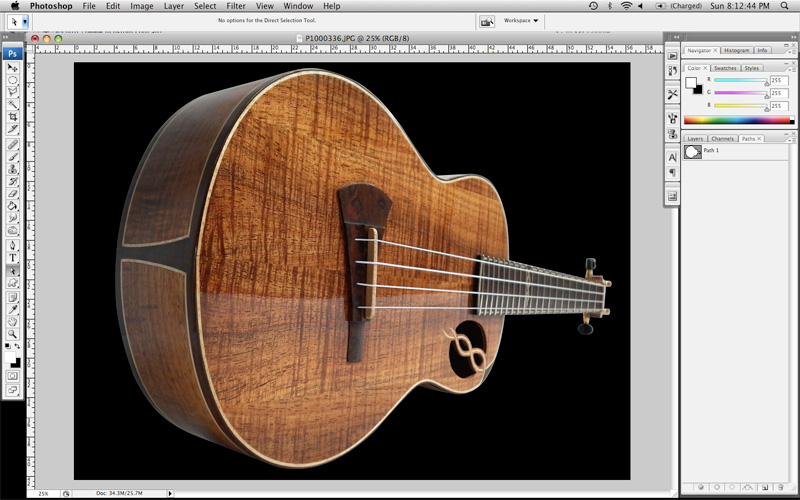
Next, the image I'll use for this part of the tute. As mentioned, I use Photoshop to remove the background. This is awesomely powerful software of which this work only scratches the surface of its capabilities, but it is all we need for the job at hand. Here is a screenshot when I open the image - if you have photoshop and yours looks different to this, it may be because of the Mac interface I use or the version of the software. The tools and methods won't alter much though.
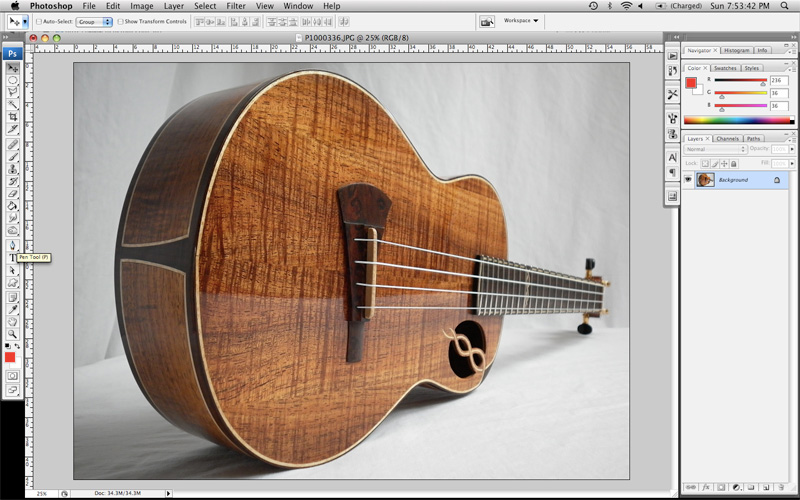
- Step1_open.jpg (137.3 KiB) Viewed 9440 times
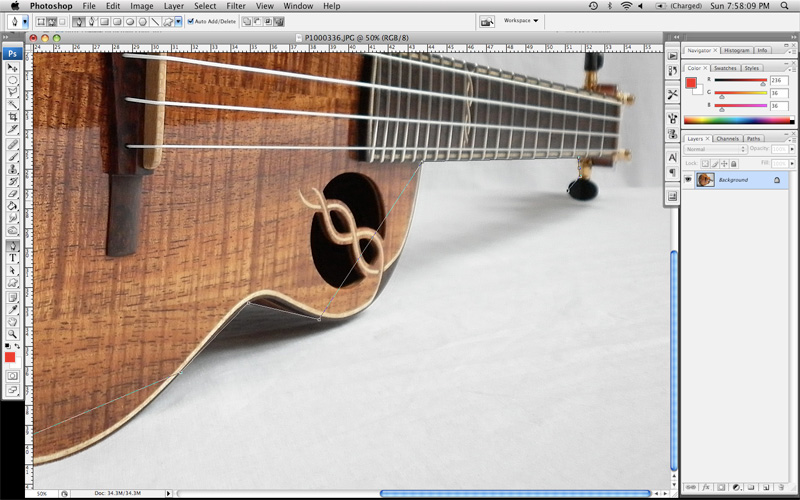
We need to create a path around the item, which is called deep etching. There
is a fancy 'one click' tool to do this called simply 'Magic Wand', but don't use it! It's crap. Well perhaps it is not and has it's purpose somewhere but for this, you would be disappointed with the pixelated results. Choose the 'Pen Tool' which looks like the little 'Quill Nib'. You can see it 'highlighted' in use on the next image. I use this to place a series of points around the outline of the guitar. It pays to zoom in on the image here as you want to be able to see what you are doing. If per chance, your image starts to "fill" the area with a colour block, there is some extra tool options on the top bar. Hovering over them will tell you what they are. If this occurs, it is likely "shapes" is highlighted whereas you want "path" to be selected.
- Step2_path.jpg (142.7 KiB) Viewed 9440 times
I place these points strategically all around the instrument, generally wherever the curve changes. You'll get a feel for where to place these the more you do and trust me - I've had a lot of practice... Carba-Tec catalogue anyone?? Yep, me... hundreds... thousands... for years... the dreams... the
nightmares - doc they're bac... Ahem, erm sorry where was I? Oh yes, like I said - lots of practice...
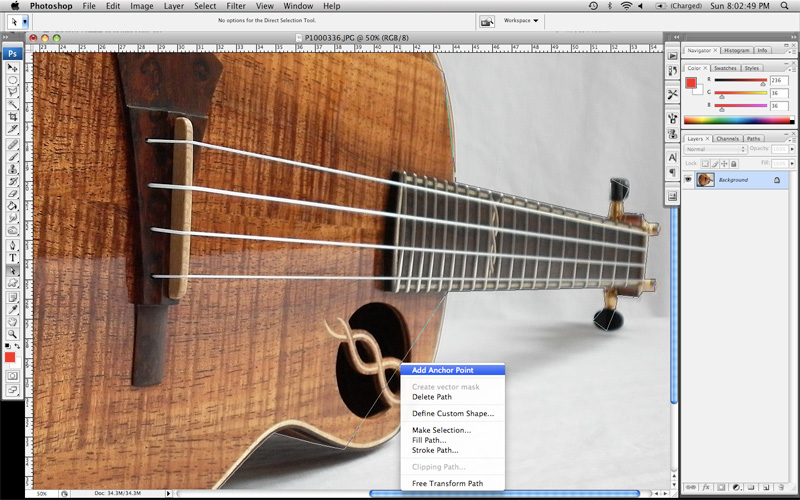
In any case, place these points around the whole instrument with a final click on your starting point to "close" the path you have created. Once you've done this, the path obviously needs refining to fit the shape of your chosen object. We do this by "right-clicking" on the path, between two points and selecting "add anchor point".
- Step3_pathcurves.jpg (164.69 KiB) Viewed 9440 times
This drops another point on the path where you clicked, but importantly, it is a bezel curve with "handles" allowing you to adjust the curve to fit precisely. If it is not, you can right click the point again and change it to bezel or curve.

- Step4_pathBezels.jpg (160.18 KiB) Viewed 9440 times
After which it is a matter of going around and adjusting your path to the outline of your entire object. It can be time consuming work, particularly with complex shapes, but it is worth the effort. When you are happy that your path fits the object well, you need to save it. On the right side of the screen, you have other tool and picture options. You can see on my pictures above, it has highlighted "layers". Next to this is a tab for "paths" and you need to select it. If it is not there on yours, it will be somewhere in those options so find it. Once you click this tab, you will see a thumbnail of your created path and it is called by default "work path". Right click on this and select "save path".
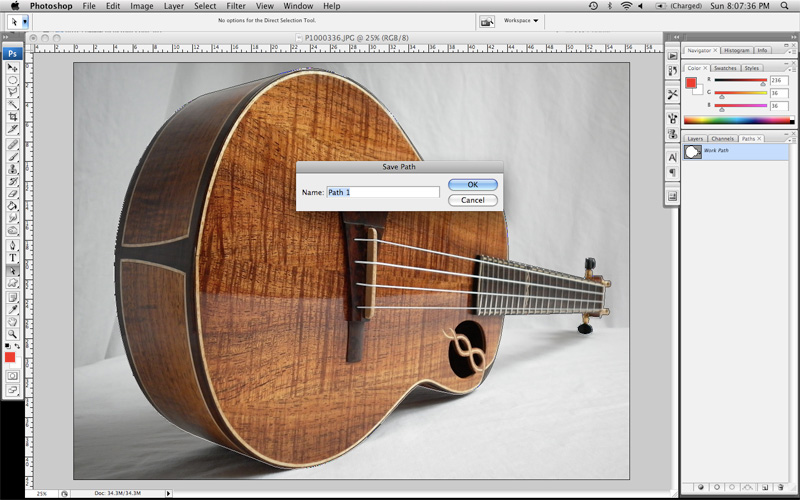
- Step5_savepath.jpg (133.62 KiB) Viewed 9440 times
After you have saved the path, the name you choose is irrelevant, right click the new name under the tab and hit "make selection".
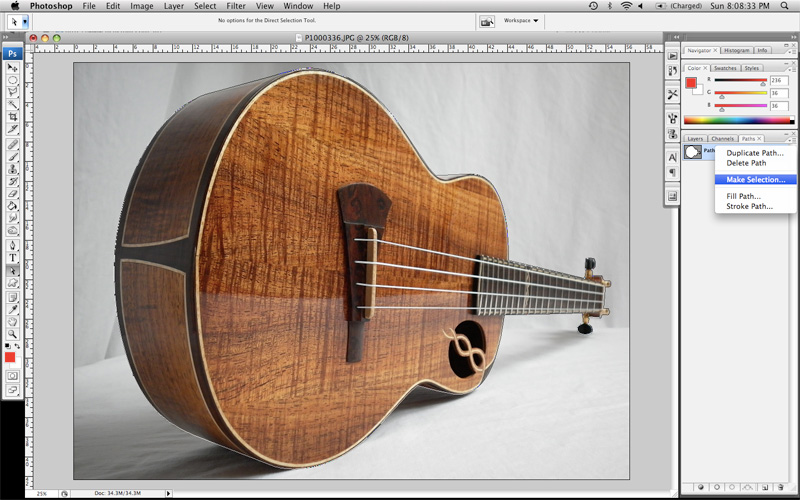
- Step6_Makeselection.jpg (139.2 KiB) Viewed 9440 times
You have now selected you object separately to the rest of the image. You want to reverse that selection so that you have highlighted the background instead. You can choose the "select" menu at the top and hit "inverse selection" there, or by using shortcut keys. On the mac this is "shift+apple(command)+i); on the pc I'm not sure but probably something like "ctrl i) or similar. The flashing dashed line should now surround your instrument or object and the outer border of the pic like this.
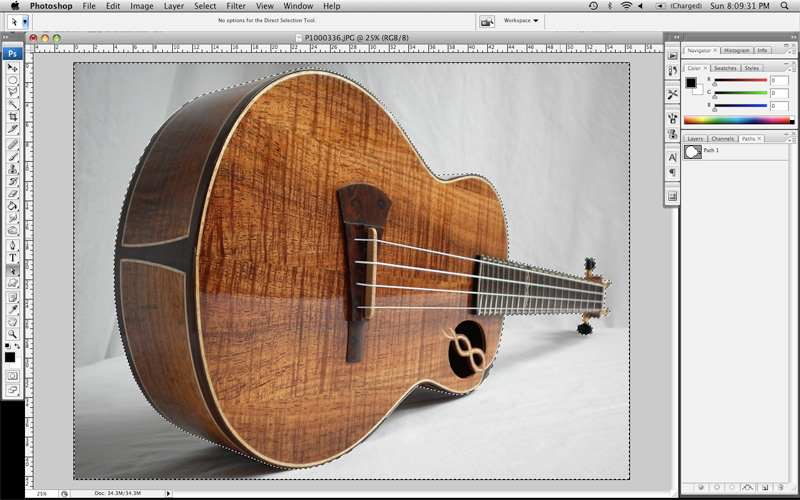
- Step7_Inverseselection.jpg (141.09 KiB) Viewed 9440 times
Then you just hit the "delete" button and it's done... more or less.

If you don't now have an image something like this, or at least what you were expecting or hoping for, something has gone amiss. Go back and work out where it went wrong! Fortunately the same tab options on the right of the screen have a "history" tab which records your steps as you go - to a set amount. So you can literally just click back through these to see where the error was made and continue on from there again.
- Step8_deletebackground.jpg (131.68 KiB) Viewed 9440 times
It will probably delete to white as your default colours are black and white - the two boxes at the bottom of the tools column on the left. You can change this to whatever you like from here and do anything... But I'm a bit old fashioned I guess and prefer to stick with black.

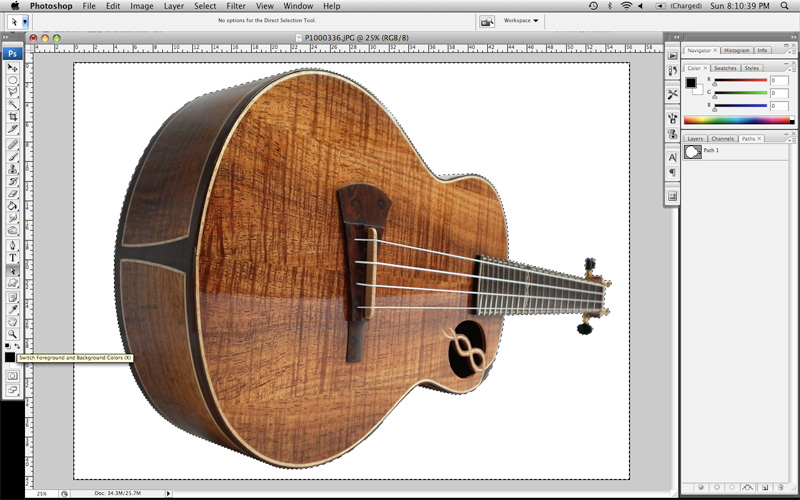
I just reverse the two colours in that box using the arrows beside them, select my path, inverse it and hit delete once more to get this - the finished product.
- Step10_black.jpg (122.28 KiB) Viewed 9440 times
And there you have it.

Hope it helps.
Cheers,
Jeremy.
PS - For anyone that recalls, there was originally a nice rainbow daisy backed image in there at the end...
If you're wondering, I'm afraid I had to drop it due to a "12 attachment limit" in place now. Shame.