This is not really a tutorial because I use a part that is "non-Standard" in this process but it is a method I use to achieve an nice touch to headstocks, it's that line of contrasting purfling that sits just inside the border of the headstock. It can be done with a line of purfling and a binding glued around the headstock the same way as you would a body but just recently I've been making those toy guitars....Ukulele's

(Sorry Allen

Actually they are lots of fun to build & in no way any less harder than a full size ) & the headstock is getting quite small and fiddly to use the binding method. Some of you may get something from this or improve it or even have a different method so feel free to add to or chip in on this post.
I use a
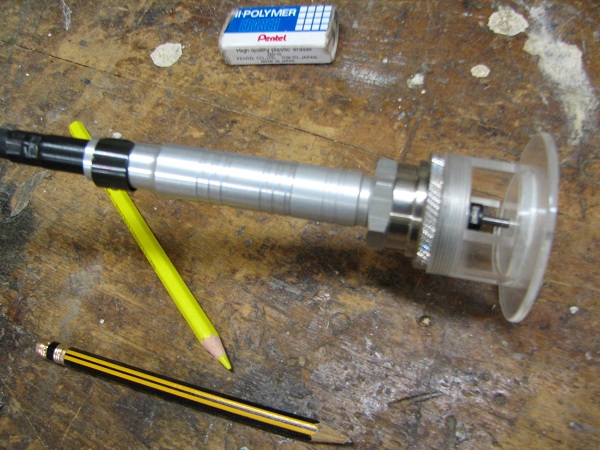
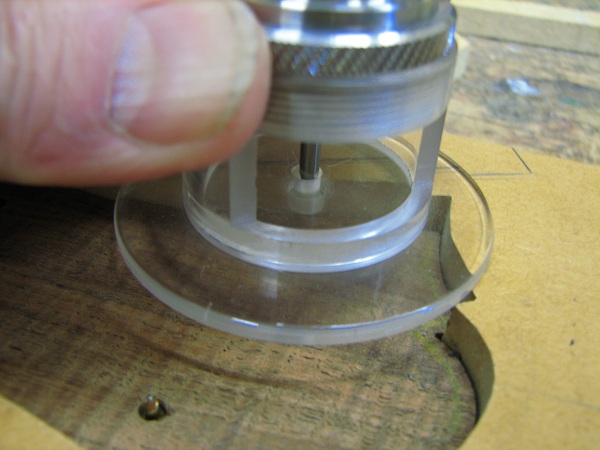
Foredom router and don't have the Stewmac base for it but I made a small one that has a 5mm spigot machined into it (the "non-standard" part!

).
- IMG_2326.jpg (127.09 KiB) Viewed 10932 times
A while ago I sent away to John Hall (tippee53 here) over there at Blues Creek Guitars for some great little
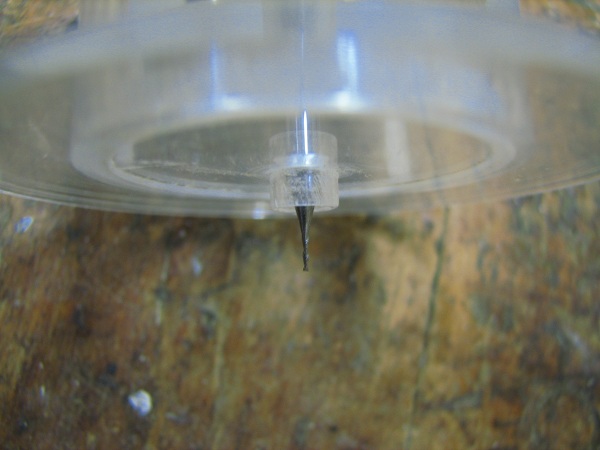
0.020" diameter carbide bits, these are just the right size for the commercial Maple purfling strips that are available.
Here's a bit mounted in my routing setup & set to depth.
- IMG_2324.jpg (61.23 KiB) Viewed 10932 times
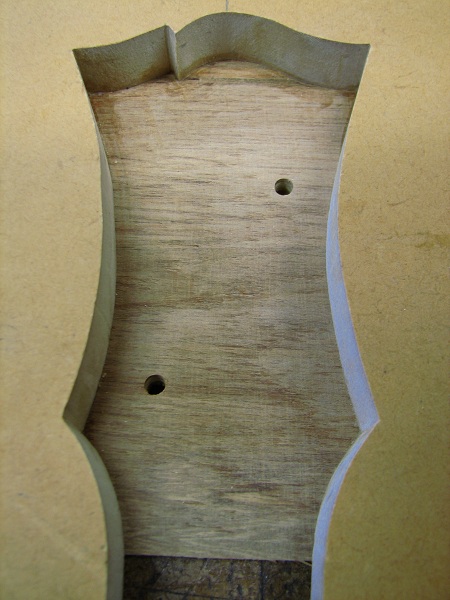
First I use the routing template I made for shaping the headstock as a pattern for the female template that I will use to follow with the base's spigot.
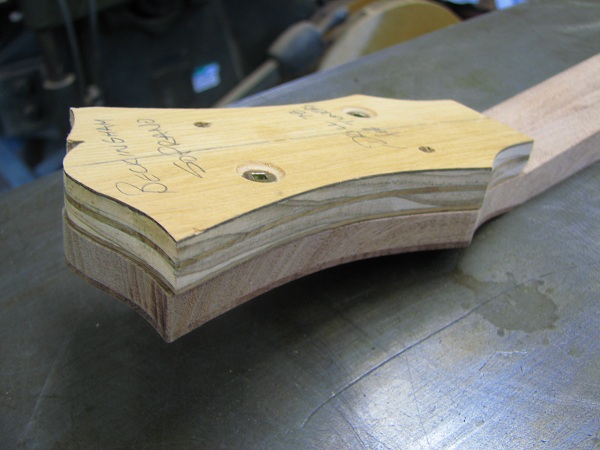
- IMG_2318.jpg (81.09 KiB) Viewed 10932 times
You'll note I use two screws at the tuner positions to hold it to the neck blank, I use these positions to also locate the pattern later.
I want the the female template to be 0.5mm bigger all the way around my headstock, this then means the centre of my cutter & purf line will be 2mm in from the edge of the headstock (this line will then be carried onto my fingerboard in the conventional binding/purfling method so it looks like a continuous line) so by marking around the outside of the headstock routing template the pencil line is thick enough that if I cut carefully
on the line with the bandsaw this gives me the right clearance, if it's slightly under, a rub with a file usually surfices to get it correct. Once I've got the shape right I glue a piece or scrap across the back of my pattern I mark & drill the 2 holes for the screws using the headstock as a drilling jig. Once the holes are drilled, this will hold the pattern to my headstock.
- IMG_2319.jpg (93.08 KiB) Viewed 10932 times
After I've drilled the holes I postion the headstock into this new template & use 0.020" shims (maple veneer or scrap purfling) to get it bang on before tightening the two screws from the rear.
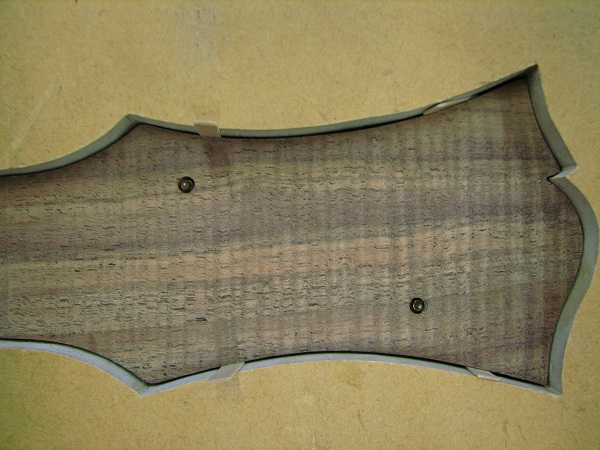
- IMG_2321.jpg (108.83 KiB) Viewed 10932 times
It's a pretty simple matter of slowly running around my pattern now, holding the spigot against the edge & cutting the groove/channel for the purfling to sit into.
- IMG_2327.jpg (76.4 KiB) Viewed 10932 times
and after
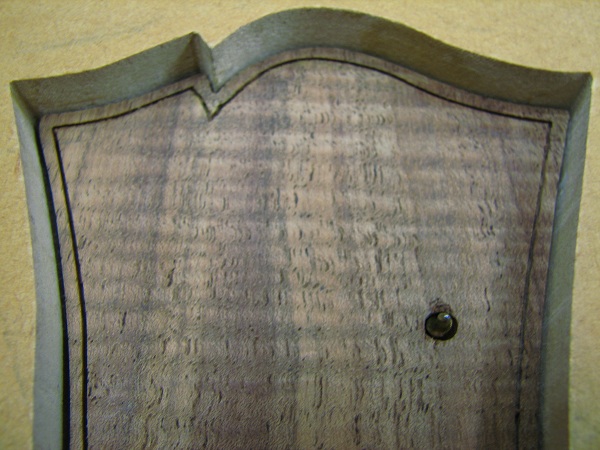
- IMG_2328.jpg (104.93 KiB) Viewed 10932 times
The 'pointy notchy' bit wouldn't have had the correct offset if I'd followed the pattern exactly (the spigot would have rolled around the point radiusing this join) so there was a small amount of freehand at this point, looks abit wobbly in the pic but the purf follows a straight line when its in.
Then it's just a light bit of pressure to get the purfling down into my channel
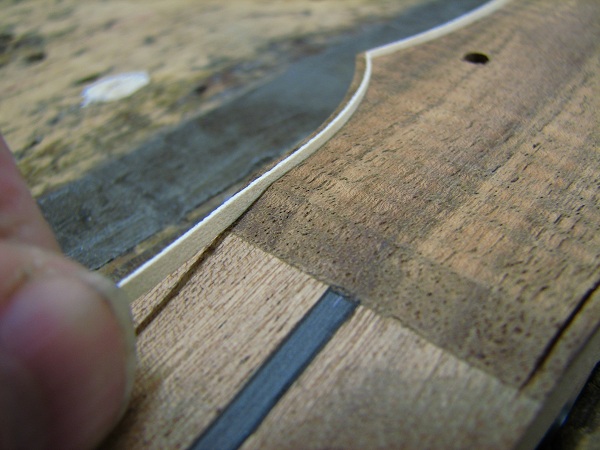
- IMG_2331.jpg (91.69 KiB) Viewed 10932 times
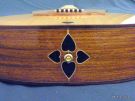
Once I've got it sitting nicely in the channel & all my corners fitting properly I wick in some thin CA just to keep it in there & level off the excess Maple after the CA's dried.
Et voila.
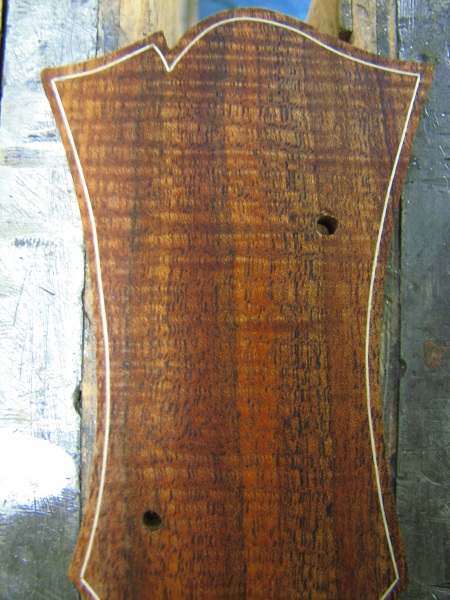
- IMG_2333.jpg (130.57 KiB) Viewed 10932 times
Anyway, that's just how I do it on smaller & more fiddlyer headstock shapes, I'd be interested to hear how others attack this.