
I think Duh Padma would be a vegetarian....no rounding of meat allowed.Puff wrote:Am picking there needs to be some meat there for the "rounding".
duh Travel Guitar
Re: duh Travel Guitar
Martin
Re: duh Travel Guitar
duh Padma wrote:
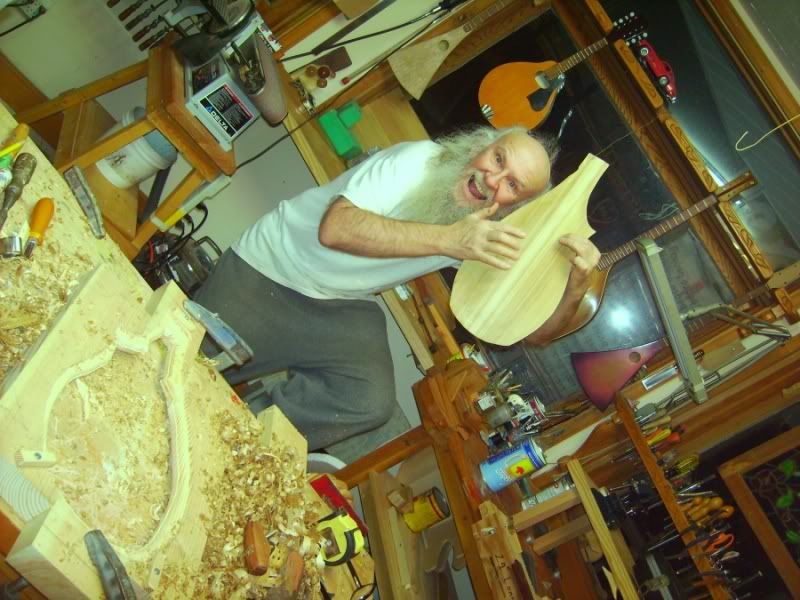
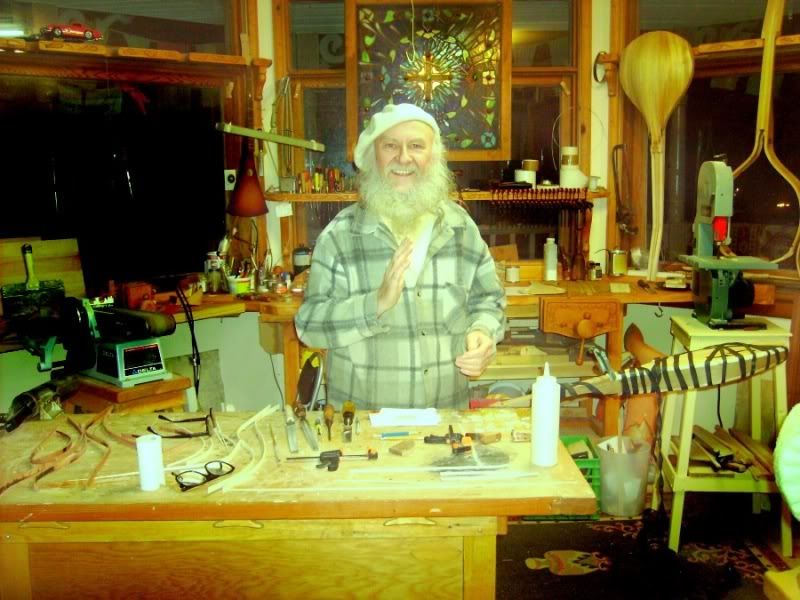
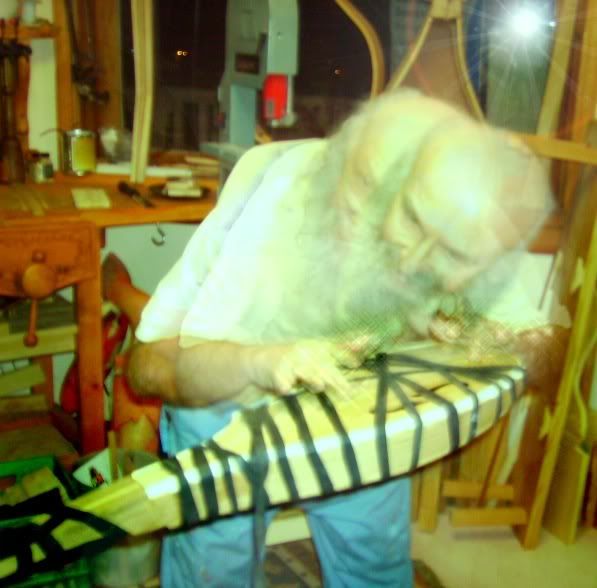
Then me checked the tap tone...well me was so delighted with its tone quality me just couldn't help me self, went tribal and started a tappin and a dancing all around me work bench.
Martin
-
DarwinStrings

- Blackwood
- Posts: 1873
- Joined: Thu Nov 13, 2008 10:27 pm
- Location: Darwin
Re: duh Travel Guitar
All that is a bit weird, I am all for the protection of intellectual property, especially as I pretend to be a artist on the odd occasion but I feel it should only be protected when it is in fact your own intellectual property (I think it was the scuba tank that was a bit of a sod when it came to patenting, not nice at all)Puff wrote:Awe hell Jim - more US patents coming up
Jim
Life is good when you are amongst the wood.
Jim Schofield
Jim Schofield
-
duh Padma

- Blackwood
- Posts: 155
- Joined: Sun Nov 14, 2010 12:25 pm
- Location: 49.479184 N,-117.284162 W
Re: duh Travel Guitar
DarwinStrings wrote:All that is a bit weird, I am all for the protection of intellectual property, especially as I pretend to be a artist on the odd occasion but I feel it should only be protected when it is in fact your own intellectual property (I think it was the scuba tank that was a bit of a sod when it came to patenting, not nice at all)Puff wrote:Awe hell Jim - more US patents coming up
Jim
For duh Padmas reply to this post
go here.
viewtopic.php?f=3&t=2910
or here
http://www.luthierforum.com/index.php?/ ... -property/
or here
http://www.luthiercom.org/phpBB3/viewto ... 101#p41101
ya and here too
http://luthiersforum.com/forum/viewtopi ... 12&t=30931
.
-
duh Padma
- Blackwood
- Posts: 155
- Joined: Sun Nov 14, 2010 12:25 pm
- Location: 49.479184 N,-117.284162 W
Re: duh Travel Guitar
Allen wrote:Now I'm scratching my head, and wondering where most of my hair has gone....oh yah, I was scratching me head and thinking about how you are going to carve those plates with all those different elevations around the perimeter to contend with. I'm going to stay tuned for that one.
Well Allen,
Me lay the plate flat on the ribs.
Scribe a parallel line onto the edge of the ban sawed plate blank.
Then go at it with chisels. Simple eh!
Once the perimeter seats on to the rims edge, me then sculpt the top and the scoop out the back, just like any other arch top instrument.
Thats how me usually do it.
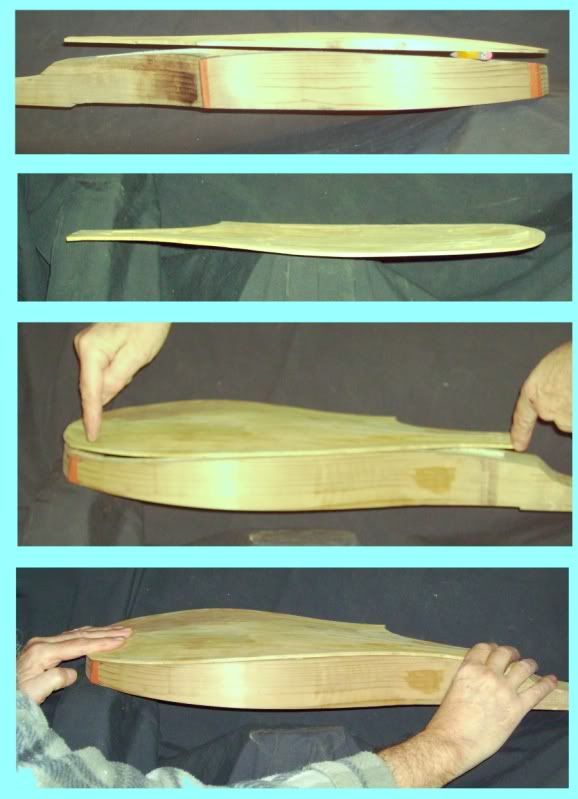
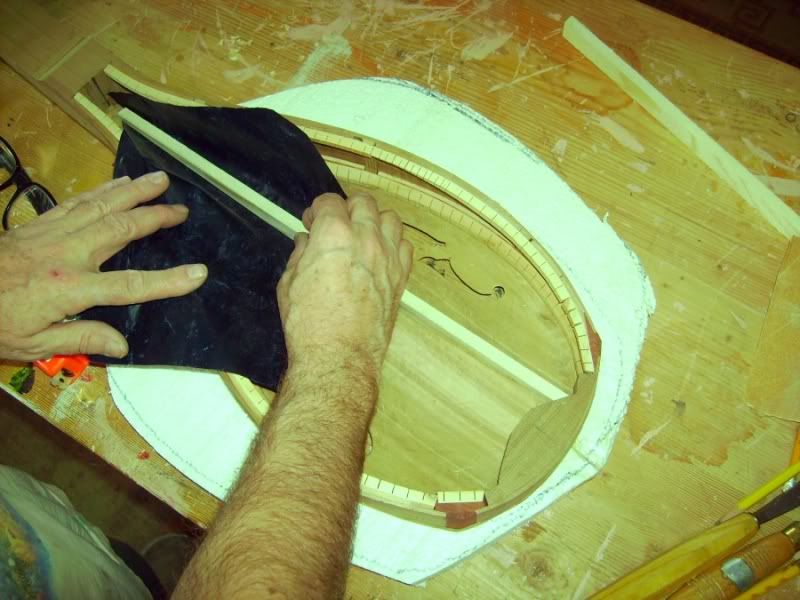
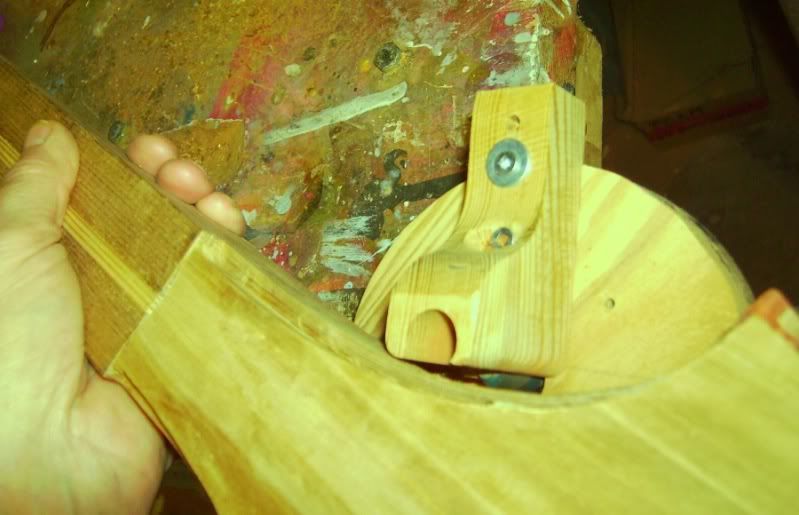
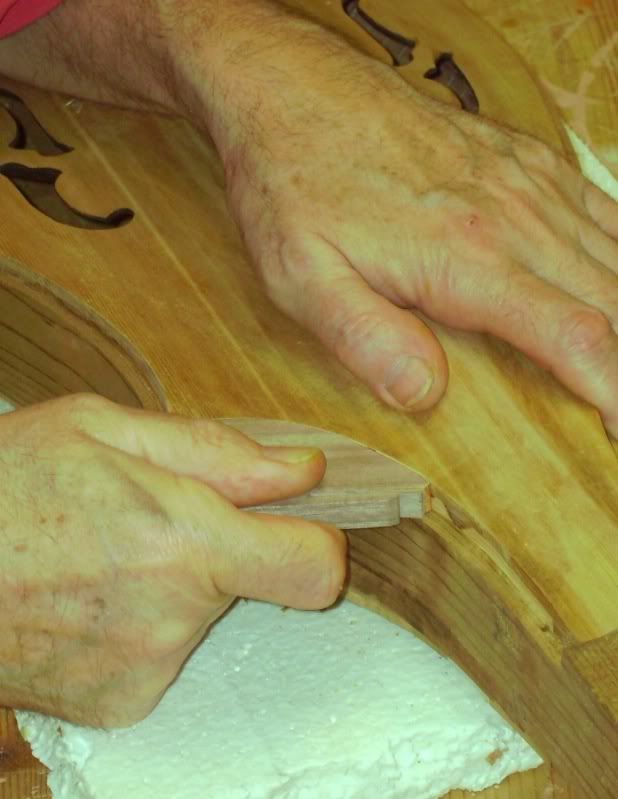
However this time the blank plate was not thick enough so after scribing the "close to a parallel line" on the edge blank I carved the backs outer profile, then the inner profile and then planed down to the line on the edge of the blank. The plate still did not fit but enough of a profile has been established on the plate to permit its flexing on to the ribs. See bottom pic series..
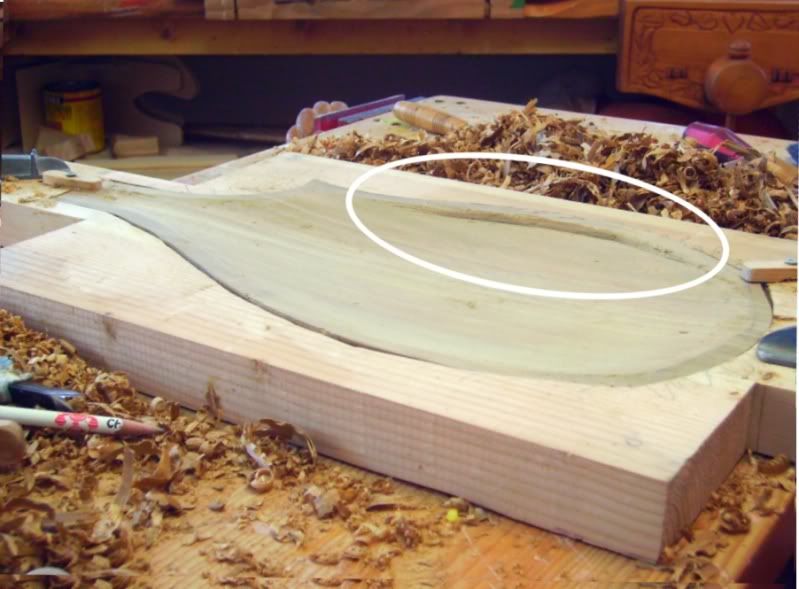
In this pic you see the carved out back and the lip (inside the oval) that has to be lowered to accommodate the changing rise of the ribs.
The top pic shows the outer carved profile of the back plate. The second in the series shows the finished carved plate...Notice it is rather bowl shaped. In the third pic you see that even though the plates perimeter is now bowl shaped, you can see where the plate needs to be flexed when gluing it to the rim. The final pic shows me very own to hands flexing the plate into place.
So now its make the internal top plates parallel braces, F holes and the closing up of the box.
Blessings
duh Padma

Re: duh Travel Guitar
You're no slouch when it comes to inventiveness. This one is coming together very nicely.
-
duh Padma
- Blackwood
- Posts: 155
- Joined: Sun Nov 14, 2010 12:25 pm
- Location: 49.479184 N,-117.284162 W
Re: duh Travel Guitar
Ya Allan , this one is moving along nicely considering me not sixty any more.
Cutting out the 2 part F holes.

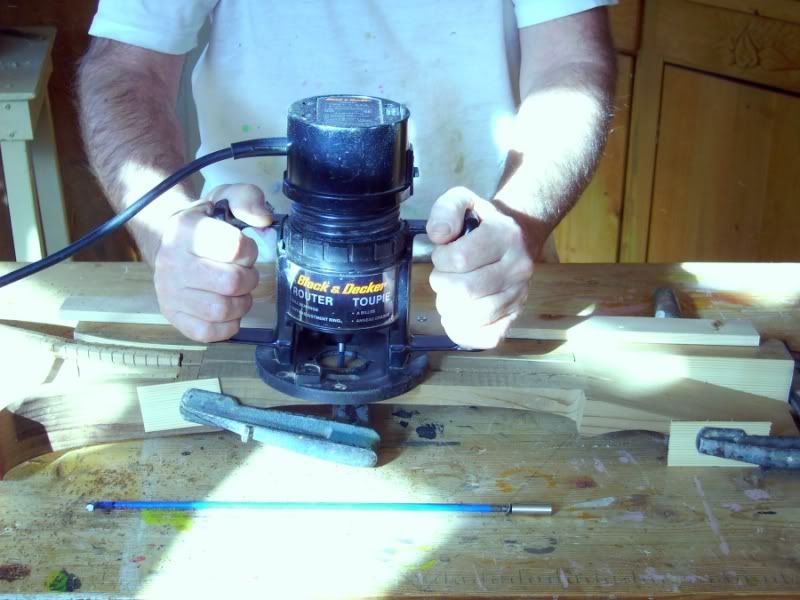
Routing out the truss rod slot.
Normally the bracing would be done now but because the profiling will change with the flexing down and gluing of the top it was left till after the clamps came off.
The bracing has been scribed, cut, fitted and installed. Unfortunately most of the pics of this process fell off the truck. Oh well. but here you can see me using carbon paper to mark were the braces need to have a talking to.

Yes the bracing is a bit thick but then this is cedar which was tooled down to about 1/8 in the recurve area and 3/8's under the bridge. So ...beefier bracing.
Cutting out the 2 part F holes.
Routing out the truss rod slot.
Normally the bracing would be done now but because the profiling will change with the flexing down and gluing of the top it was left till after the clamps came off.
The bracing has been scribed, cut, fitted and installed. Unfortunately most of the pics of this process fell off the truck. Oh well. but here you can see me using carbon paper to mark were the braces need to have a talking to.
Yes the bracing is a bit thick but then this is cedar which was tooled down to about 1/8 in the recurve area and 3/8's under the bridge. So ...beefier bracing.
Re: duh Travel Guitar
Seeing you dancing round there Pad you look like one of Santas elves enjoying himself.
What puts the sparkle in those eyes Pad ?
Steve
What puts the sparkle in those eyes Pad ?
Steve
-
duh Padma
- Blackwood
- Posts: 155
- Joined: Sun Nov 14, 2010 12:25 pm
- Location: 49.479184 N,-117.284162 W
Re: duh Travel Guitar
Kamusur wrote:Seeing you dancing round there Pad you look like one of Santas elves enjoying himself.
What puts the sparkle in those eyes Pad ?
Steve
Oh yes Seve,
There is something to be said about Elfin magic eh!
Regarding the sparkle in me eyes...its just the joy of life shining through.
Now me eyes sparkling in me avatar is a gif animation done did for your viewing enjoyment by anzlif's very own Matthew. Thank you Matthew.
-
duh Padma
- Blackwood
- Posts: 155
- Joined: Sun Nov 14, 2010 12:25 pm
- Location: 49.479184 N,-117.284162 W
Re: duh Travel Guitar
You dudes...
Me convinced me now know more than me use to, trouble is me be forgetting it faster n me learning it....now what?
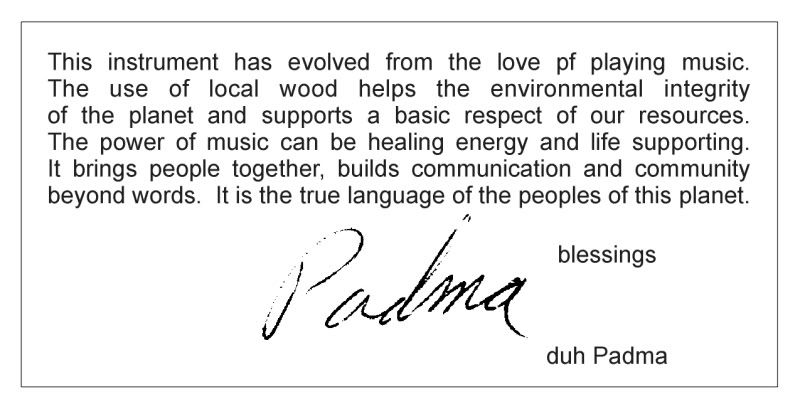
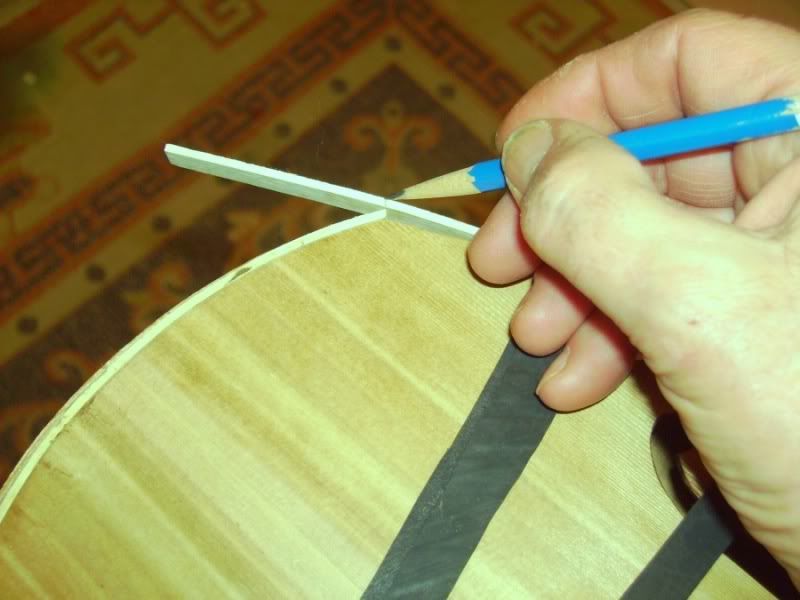
Before me close her up in the morning, me paint the braces around the F holes dark brown or black and stick this label on the inside of the back plate.
Ya, It ain't a fancy shmancy De~signed label with a logo...but it does get the message across don't ya think. Of course it ain't as big as it appears here, actually some peoples need a magnifying glass to reads it.
Ok here is the pic with the 8 braces...This style of F holes me got from Steve Stevens a while back...modified them to make me even happier and started using it as me signature and found out that they needs back braces to be happy especially if me keep takeing the recurves down to less than 3/16. But then me never really played it safe in me life...well...only when it comes to building houses schools and banks which me don't be doin no more...especially banks!

Ya, she may be ugly on the inside...just like some people but look at all that wood...thick braces, double lined re enforced ribs, heavy duty kurfed lining...with cedar top thats only .110 in the recurves and .180 max under the bridge. Same for the back plate....Gee you would think this is a travel guitar thats really meant to go travelin ...well ummm ya ~ It is.
As daddy use to say...in his Bo-honk accent "build strong ...no fall part!"
Yup...
Strong like bull
Light like feather
Sweet like bird
Dumb like street car.
Dudes you should here the tap tones on these plates.
Tomorrow the back is gonna be on. Then me really know much better she what she gonna sound like.
blessings
duh Padma
Me convinced me now know more than me use to, trouble is me be forgetting it faster n me learning it....now what?
Before me close her up in the morning, me paint the braces around the F holes dark brown or black and stick this label on the inside of the back plate.
Ya, It ain't a fancy shmancy De~signed label with a logo...but it does get the message across don't ya think. Of course it ain't as big as it appears here, actually some peoples need a magnifying glass to reads it.
Ok here is the pic with the 8 braces...This style of F holes me got from Steve Stevens a while back...modified them to make me even happier and started using it as me signature and found out that they needs back braces to be happy especially if me keep takeing the recurves down to less than 3/16. But then me never really played it safe in me life...well...only when it comes to building houses schools and banks which me don't be doin no more...especially banks!
Ya, she may be ugly on the inside...just like some people but look at all that wood...thick braces, double lined re enforced ribs, heavy duty kurfed lining...with cedar top thats only .110 in the recurves and .180 max under the bridge. Same for the back plate....Gee you would think this is a travel guitar thats really meant to go travelin ...well ummm ya ~ It is.
As daddy use to say...in his Bo-honk accent "build strong ...no fall part!"
Yup...
Strong like bull
Light like feather
Sweet like bird
Dumb like street car.
Dudes you should here the tap tones on these plates.
Tomorrow the back is gonna be on. Then me really know much better she what she gonna sound like.
blessings
duh Padma
-
matthew

- Blackwood
- Posts: 1193
- Joined: Mon Oct 08, 2007 1:16 pm
- Location: Sydney, Inner West
- Contact:
Re: duh Travel Guitar
Love the typo in the label Padma! 
a carefully disguised imperfection ... truly Zen ...
a carefully disguised imperfection ... truly Zen ...
-
duh Padma
- Blackwood
- Posts: 155
- Joined: Sun Nov 14, 2010 12:25 pm
- Location: 49.479184 N,-117.284162 W
Re: duh Travel Guitar
matthew wrote:Love the typo in the label Padma!
a carefully disguised imperfection ... truly Zen ...
Aw shit...was not no Zen! Just stupid typo. Now me gotta do deal with it.
Thanks for drawing to me attention.
blessings
-
matthew
- Blackwood
- Posts: 1193
- Joined: Mon Oct 08, 2007 1:16 pm
- Location: Sydney, Inner West
- Contact:
Re: duh Travel Guitar
Would you consider using linen patches or a crossgrain veneer instead of those potato chips behind the F holes?
-
duh Padma
- Blackwood
- Posts: 155
- Joined: Sun Nov 14, 2010 12:25 pm
- Location: 49.479184 N,-117.284162 W
Re: duh Travel Guitar
Well Matthew
me just didn't feel like kicken over the ford to drive in to town to buy 6 inches of linen knowing that I'd have to deal with the grumpiest dude in town...the cloth merchant.
So...me went to the potato chips (they be about .105) and now realize , yes me could have used some maple veneer of which me has plenty.
Oh well ...too late, me reveres gear don't work to well.
But on the next carved top it gonna be linen.
Last edited by duh Padma on Thu Feb 10, 2011 8:26 am, edited 1 time in total.

Re: duh Travel Guitar
The traveler is certainly looking the part there Duh, will you be adorning the neck heel of this one with any of that famous Padma relief carving?
Cheers
Kim
Cheers
Kim
-
duh Padma
- Blackwood
- Posts: 155
- Joined: Sun Nov 14, 2010 12:25 pm
- Location: 49.479184 N,-117.284162 W
Re: duh Travel Guitar
Thank you Kim
It was me original thought to do so ~ carve her all up and what not...
but the simple truth is, she aint got the bucks for such treatment.
Sorry.
However, if you wanna see carving, well them me direct you to me Easter Lilly Build. It has the "F' holes disguised as morning glories which is one hell of a challenging carve. Depending on just how well me pull of the top will determine if me do a heal and headstock treatment as well. If me haven't posted it here yet it will be in a day or two. But you can find it on the other sites.
Ya me itchen to kick over me "twisted up" cedar slabs, Pic out a couple that jump out at me and just go at it. Ya know, all carved head to toe...with no plans or drawings ~ a just do it kind of thing...much in line like the NO NOthing Build...which me should be postin to in a few more days.
Blessings
-
duh Padma
- Blackwood
- Posts: 155
- Joined: Sun Nov 14, 2010 12:25 pm
- Location: 49.479184 N,-117.284162 W
Re: duh Travel Guitar
matthew wrote: "Ce n'est pas possible de faire briller une crotte ..."
Yo, Matthew
Ya bien ...me gifle sur quelques manteaux de ces choses bon marché luisantes du magasin d'oncle Wally Mart. ..she sera assez brillant. Asperger sur quelques gosses sparklies... elle est juste fine !
blessings
-
duh Padma
- Blackwood
- Posts: 155
- Joined: Sun Nov 14, 2010 12:25 pm
- Location: 49.479184 N,-117.284162 W
Re: duh Travel Guitar
.
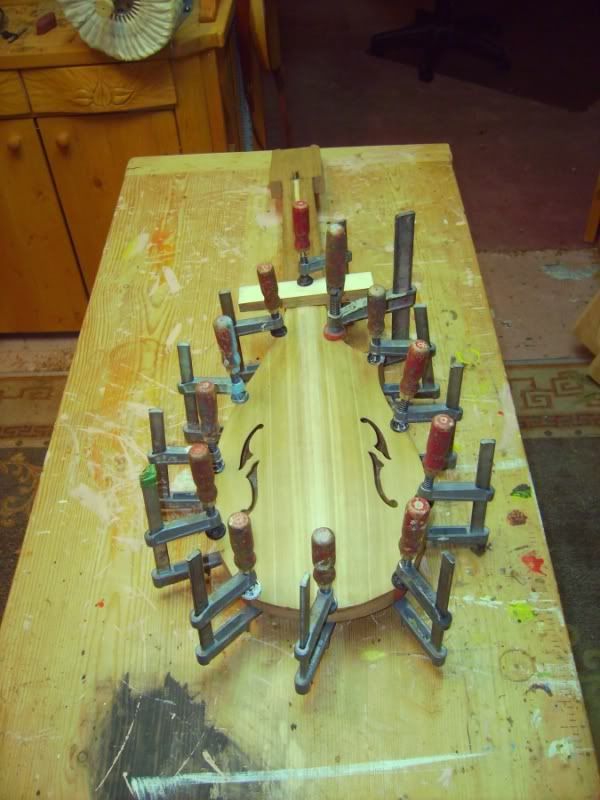
Signed the plates , glued in the sticker, wrapped her up and put her to sleep for the night
Maybe I start the banding in the morning or maybe me work on the Easter Lily and get her closed up too. Ya better do that and then me can band both at the same time.
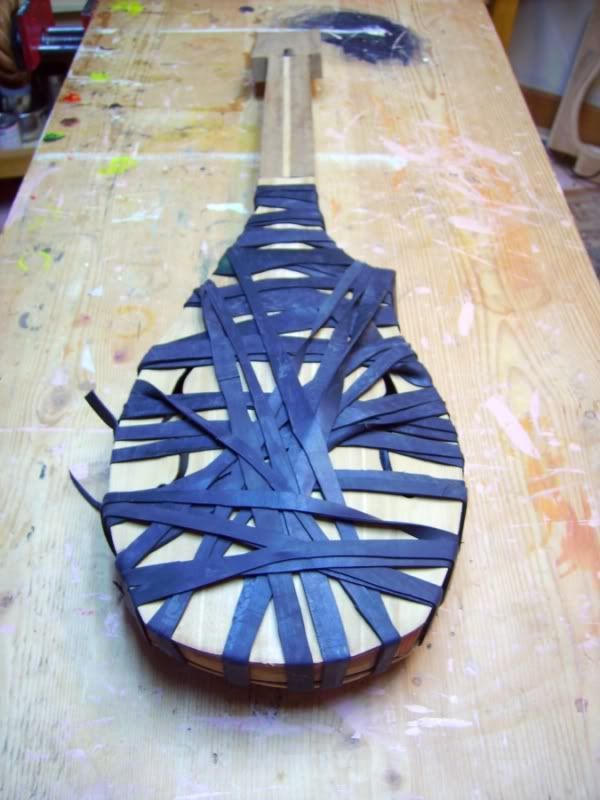
Yup inner tube..but ya gotta really appreciate were the stuff comes form.
Like BIG Truck tires 18 wheeler jobs is supper thick strong rubber
15 or 16 inch tire tubes good solid rubber
12 or 13 inch is thinner again and more stretchy
and bicycle inner tube is both thin and much more stretchy
Depends on what me doing as to what me use.
blessings
duh Padma
Signed the plates , glued in the sticker, wrapped her up and put her to sleep for the night
Maybe I start the banding in the morning or maybe me work on the Easter Lily and get her closed up too. Ya better do that and then me can band both at the same time.
Yup inner tube..but ya gotta really appreciate were the stuff comes form.
Like BIG Truck tires 18 wheeler jobs is supper thick strong rubber
15 or 16 inch tire tubes good solid rubber
12 or 13 inch is thinner again and more stretchy
and bicycle inner tube is both thin and much more stretchy
Depends on what me doing as to what me use.
blessings
duh Padma
-
duh Padma
- Blackwood
- Posts: 155
- Joined: Sun Nov 14, 2010 12:25 pm
- Location: 49.479184 N,-117.284162 W
Re: duh Travel Guitar
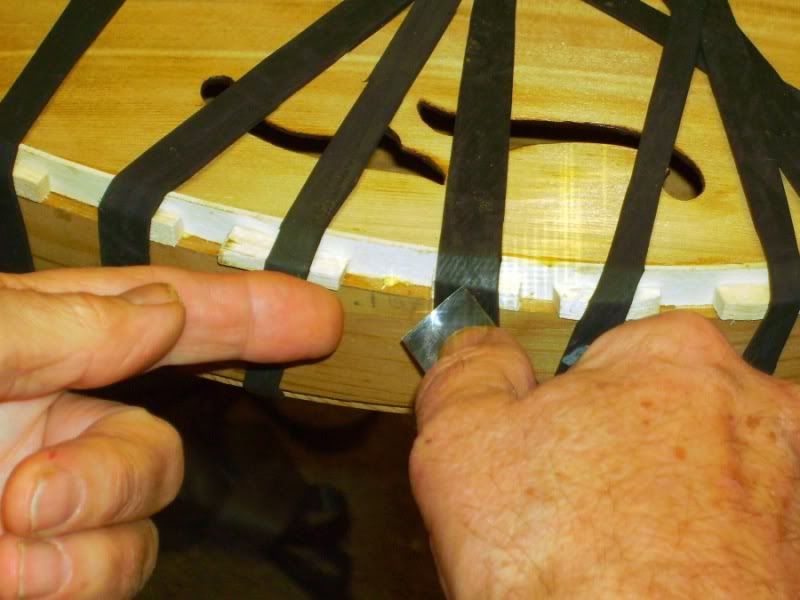
.
Rabbiting for the Banding
well me first rough cut the rabbit with this old Black and Decker held in the Recorder.
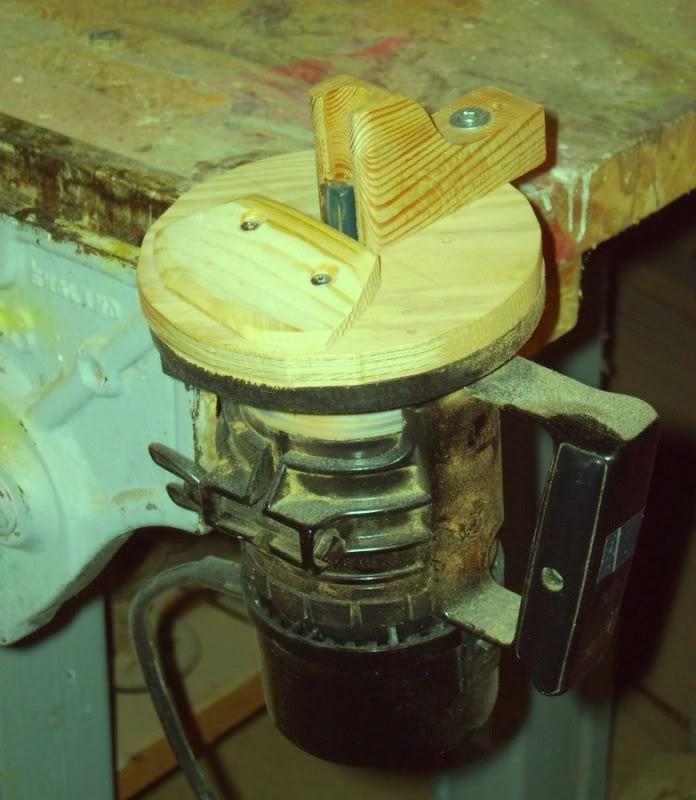
Then used this little attachment on the Drememl to clean up the rabbit.
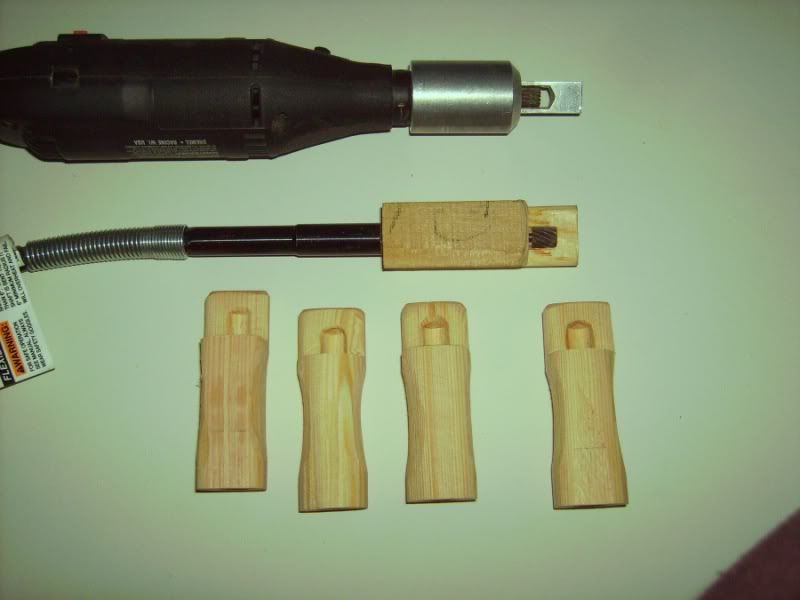
Here you can see some home made attachments that do the same thing but fit on the dremels pencil extension.....much easier to control

Me then made a sanding block.....
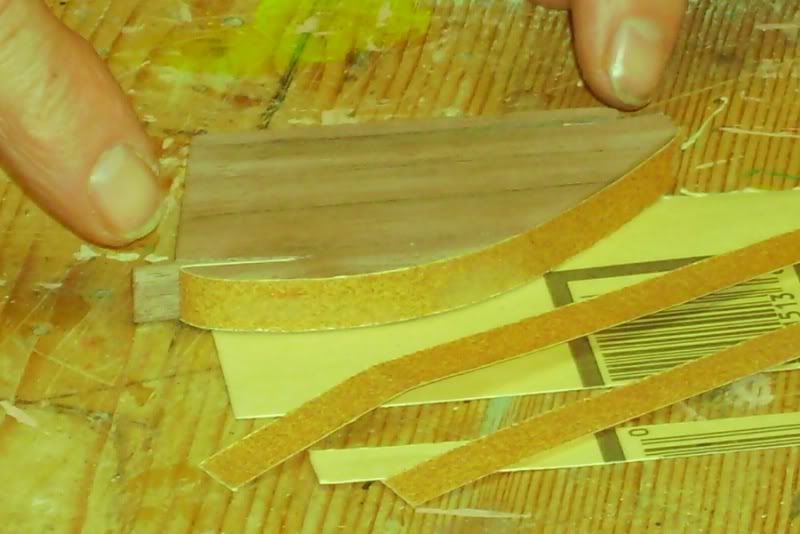
To clean up the rabbit.
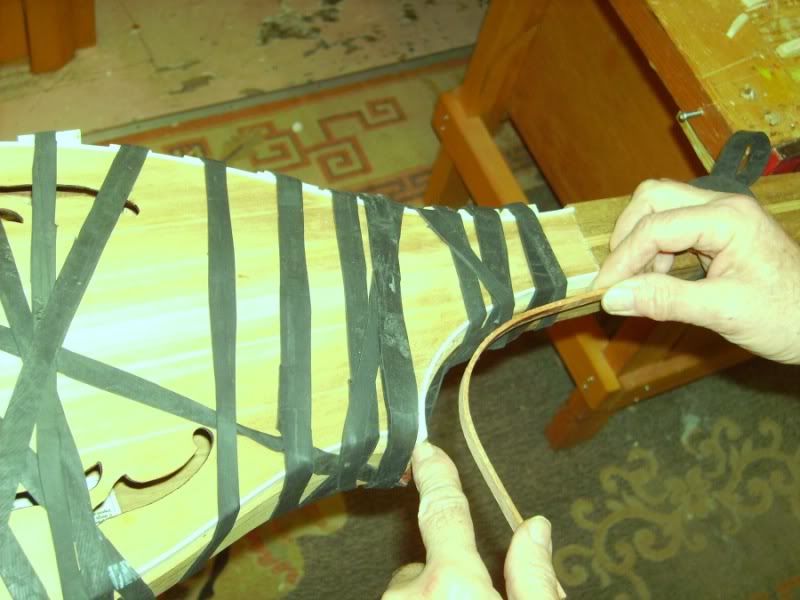
Banding
Ok here we start the banding...
Was suppose to be using Paduke...but me was not having any success in bending it so moved over to Sirari, a very hard South American wood that is easy to bend and kinda pinkish in colour.
Here you can see the bent sirari and white holly from Jesse Burge, and the assortment of tools needed for this operation.

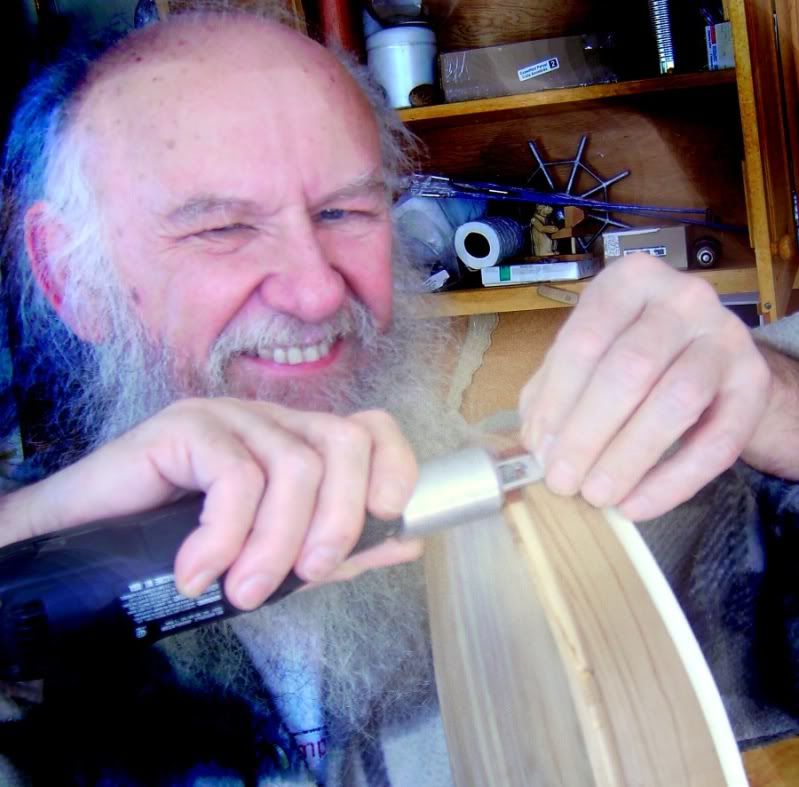
He be nice pic of me with a loop for too be eyeballing the edge of the chisel that is really a scraper for cleaning out the glue after installing the holly. (Actualuty me using me X Ray Heat Vision to Cosmically re temper the edge. But please, don't go and be tellin no body, you know what they do to people like me!)

Ya, her tap tone is sounding gooder.
Will post again when the Sirari has been installed.
blessings
duh Padma
Rabbiting for the Banding
well me first rough cut the rabbit with this old Black and Decker held in the Recorder.
Then used this little attachment on the Drememl to clean up the rabbit.
Here you can see some home made attachments that do the same thing but fit on the dremels pencil extension.....much easier to control
Me then made a sanding block.....
To clean up the rabbit.
Banding
Ok here we start the banding...
Was suppose to be using Paduke...but me was not having any success in bending it so moved over to Sirari, a very hard South American wood that is easy to bend and kinda pinkish in colour.
Here you can see the bent sirari and white holly from Jesse Burge, and the assortment of tools needed for this operation.
He be nice pic of me with a loop for too be eyeballing the edge of the chisel that is really a scraper for cleaning out the glue after installing the holly. (Actualuty me using me X Ray Heat Vision to Cosmically re temper the edge. But please, don't go and be tellin no body, you know what they do to people like me!)
Ya, her tap tone is sounding gooder.
Will post again when the Sirari has been installed.
blessings
duh Padma
-
sebastiaan56
- Blackwood
- Posts: 1274
- Joined: Sun Oct 28, 2007 5:23 am
- Location: Blue Mountains
Re: duh Travel Guitar
You're a friggin cack Padma. When tempering is it better to align the molecules with directed psychic energy or allow the chi to align by itself? I look forward to the eBook at Amazon.
make mine fifths........
-
duh Padma
- Blackwood
- Posts: 155
- Joined: Sun Nov 14, 2010 12:25 pm
- Location: 49.479184 N,-117.284162 W
Re: duh Travel Guitar
sebastiaan56 wrote:You're a friggin cack Padma. When tempering is it better to align the molecules with directed psychic energy or allow the chi to align by itself? I look forward to the eBook at Amazon.
Thank you sebastiaan, at least me think me should be thanking you. See not being from down under, me not familiar with your Oz colloquiums such as "friggin cack" But must afford you the benefit of the "no bout a dout it" and as such say "thank you."
Regarding Tempering ...this is a good question. One is direct interference, influencing and meddling with, while the other is wash hands and let it do its own thing.
Something to be said about Non Interference.
However...me would have to answer with "It depends on the intent of the tempering" wouldn't you think...for example....tempering steel as opposed to a puppy dog or even the human progeny of rug rats so that they may both be better prepared to handle living a life.
Yes it seems that even tempering needs to be examined for its intent. Just like everything else, no?
blessings
duh Padma
Re: duh Travel Guitar
Being from the Eastern Isles "friggin cack" is not in common usage for those of my age so passes by.
"Something to be said about Non Interference." Being (attempting) of the Stoic and Taoist path I am of this opinion too.
Not sure there isn't some confusion between "tempering" and "tampering" here.
"Something to be said about Non Interference." Being (attempting) of the Stoic and Taoist path I am of this opinion too.
Not sure there isn't some confusion between "tempering" and "tampering" here.
-
duh Padma
- Blackwood
- Posts: 155
- Joined: Sun Nov 14, 2010 12:25 pm
- Location: 49.479184 N,-117.284162 W
Re: duh Travel Guitar
Puff wrote:Being from the Eastern Isles "friggin cack" is not in common usage for those of my age so passes by.
"Something to be said about Non Interference." Being (attempting) of the Stoic and Taoist path I am of this opinion too.
Not sure there isn't some confusion between "tempering" and "tampering" here.
Confusion...naw, both are an attempt to change from what was to what is, or maybe. therefor in the last analysis are one and the same thing. No?
blessings
Re: duh Travel Guitar
Yes and no. Tempering refers to a specific of tampering I believe. Too soon for babel.
-
matthew
- Blackwood
- Posts: 1193
- Joined: Mon Oct 08, 2007 1:16 pm
- Location: Sydney, Inner West
- Contact:
Re: duh Travel Guitar
Padma I think it's time you introduced your photographer.
Who is online
Users browsing this forum: No registered users and 82 guests